Prices and stock may differ due to devaluation of Pkr and Global chip shortage, however we will confirm the current prices and stock on order confirmation call.
If you’re looking for some fun photo manipulation ideas to create stunning art, you’ve come to the right place.
Today, manipulating digital photography is a quick and easy process. Want to generate a double-exposure look? Create a tilt-shift effect? Simulate a fisheye lens? All these options and more are accessible thanks to image manipulation programs like Photoshop.
So here are some photo manipulation ideas to get your creative juices flowing!
1. Make a tilt-shift effect
When viewing a landscape from a distance, the scene looks uniformly focused to our eyes. However, when we look at a fake or model landscape, our physical proximity to the miniature scene creates some interesting optical effects.
But you don’t need a fake landscape to create this “tilt-shift” effect. With the right lenses, you can achieve it in-camera – or you can replicate the phenomenon in post-processing!
2. Generate an anaglyph 3D effect
Anaglyph 3D renderings are made up of two differently filtered and slightly offset colored images. When viewed through special glasses, the two different colors are seen by different eyes, creating a 3D effect.
Creating an anaglyph 3D image in Photoshop is easy. First, open a photo and duplicate the Background layer twice. Select one of the duplicated layers and click on the FX icon at the bottom of the Layers panel. Select Blending Options – this will open the Layer Style window. Uncheck the G and B checkboxes next to Channels in the central panel. Then click OK.
3. Imitate a circular fisheye lens
Photo manipulation ideas inspired by camera equipment can achieve engaging results. A fisheye lens is an ultra-wide-angle that produces a large amount of distortion, creating distinctive panoramic or hemispherical images.
To create a circular fisheye effect, open an image and select the Elliptical Marquee tool. Set the Style dropdown on the top menu to Fixed Ratio and drag the Marquee tool over the center of the image. Click Filter > Distort > Spherize. Adjust the amount of distortion you’d like in the pop-up panel (I usually leave the slider at 100%).
4. Combine two images for a double exposure effect
rom the days of early photography, shooters have gone to considerable lengths to avoid ghosting and double exposures. However, some photographers generate multiple exposures deliberately for creative purposes.
Double exposures can be made in-camera (both digitally and on film), but they can also be imitated in Photoshop.
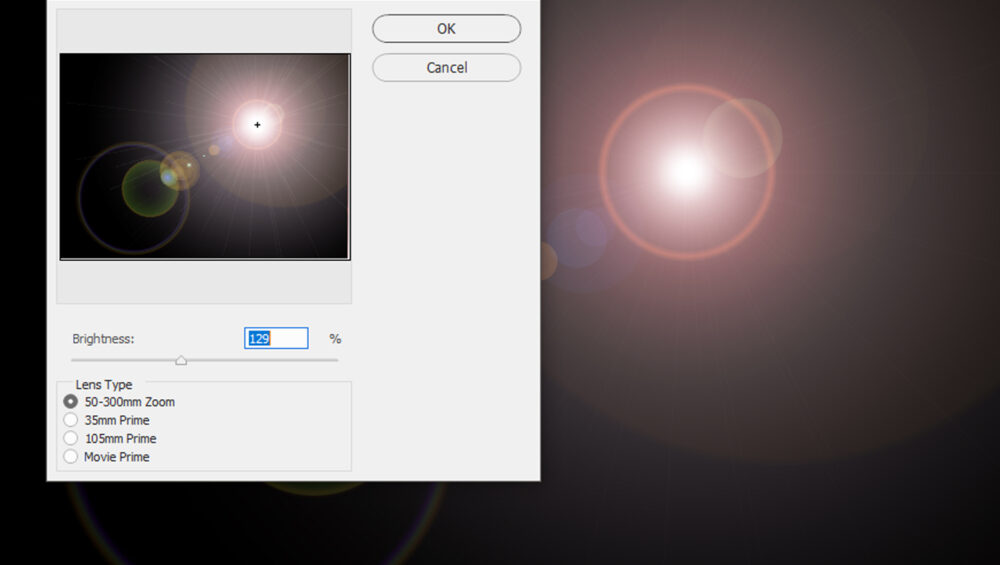
5. Create a lens flare
When bright light reaches your camera, it can reflect off different parts of the lens to create an interesting flare effect.
While lens flare is sometimes unwanted, it can have interesting creative applications.
6. Create a sepia look with Photoshop
Sepia is a warm brown tone named after the pigment derived from the ink sac of the cuttlefish genus Sepia. In photography, the term sepia refers to a form of print toning. The use of sepia in photography began in the 1880s, and today the beautiful warmth of sepia toning is associated with age and history.
To apply a sepia tone to a photograph in Photoshop, first, open an image. Create a Curves adjustment layer and adjust the curve to introduce a faded aesthetic
Photo manipulation ideas: Conclusion
From Lomography-inspired effects to simulated glitch art, the creative possibilities of photography are just about limitless. So if you find yourself in a creative rut, give one of the photo manipulation ideas from this list a try – you never know what new perspectives your manipulations might inspire!
What are aspect ratios in photography? How does an aspect ratio affect your images? And how can you change the aspect ratio once you’ve taken a photo?
In photography, aspect ratio represents the relationship between the width and the height of an image. It can be expressed as a number followed by a colon and followed by another number, such as 3:2, or by a decimal number such as 1.50 (which is simply the long side divided by the short side). Some even prefer to express aspect ratio as a decimal, followed by a colon and number 1, such as 1.50:1.
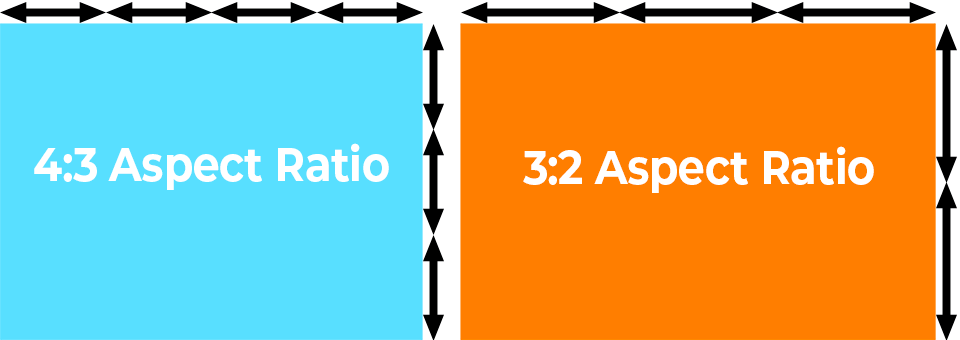
You can easily visualize any aspect ratio by allocating units to the width and the height of an image. For example, a 4:3 aspect ratio would consist of 4 equal size units for its width and 3 equal size units for its height. Similarly, an image with a 3:2 aspect ratio would be represented by 3 equal size units for its width vs 2 units for its height, as shown below:
Why does aspect ratio matter?
Different aspect ratios will produce different types of compositions.
For instance, a square, 1:1 aspect ratio tends to produce very balanced, often confined images.
A 4:5 or a 3:2 aspect ratio offers a bit more space within the frame.
And a 16:9 aspect ratio gives a lot of room for expansion along the image edges.
Common camera aspect ratios
Virtually every camera sensor offers one of two aspect ratios:
3:2 aspect ratio
A 3:2 aspect ratio is used by 35mm crop-sensor and full-frame DSLRs, some Leica medium format cameras, most mirrorless cameras, high-end compact cameras, and most 35mm film cameras. This aspect ratio has been with us ever since Leica made the first 35mm film cameras in the early 20th century.
4:3 aspect ratio
The 4:3 aspect ratio is used by Micro Four Thirds cameras, many compact cameras, some medium format digital cameras, as well as medium format film cameras using the 6 cm x 4.5 cm format.
Why Aspect Ratio is Important
Understanding the fundamentals of aspect ratio is very important, because of the way it affects your final image. This can be especially critical at the time of physically capturing a photograph.
For example, if you capture an image with a camera in its native 4:3 aspect ratio and cram your subject or important elements of the scene to the edges of the frame, you might not be able to crop the image to wider aspect ratios.
Pro Tip
Need to crop to a certain paper size in Photoshop?
Just enter the size of your print as the ratio in the width and height boxes, just as you did in the example above (for example, 8.5:11).
Everything just gets better in 2021! From budget-friendly beginners’ cameras, to exotic lenses, dazzling flash kits, tricked-up tripods and beyond, we’ve seen some fabulous gear from Canon this year.
Looking for the best Canon camera? Canon has launched some stunning models in its photographic line-up. Other manufacturers including Benro, Elinchrom and Manfrotto, to name but a few, have also really impressed us.
Canon EOS M50
The Canon EOS M50 mirrorless system camera is compact and lightweight, and we love its retracting 15-45mm kit lens, which delivers excellent wide-angle potential. Despite its size, the M50 feels like a ‘proper’ camera, with its electronic viewfinder and sculpted finger grip. Around the back, the fully articulated ‘vari-angle’ touchscreen makes for slick and intuitive control. We’re also impressed that the 24MP Dual Pixel AF image sensor ensures rapid autofocus and great image quality.
Canon EOS 1500D with 18-55mm Lens
We like that the Canon EOS 1500D with 18-55mm Lens small and lightweight enough to take anywhere and everywhere and that it’s so simple to use. The vari-angle screen enables novel shooting angles, injecting fun into photography.
And when we’re in a more serious shooting mood, the dual control dials and top-panel info LCD come to the fore, as featured on enthusiast-level cameras.
Super specs include a Dual Pixel AF image sensor, 45-point autofocus system, a 5-axis sensor-shift stabilizer for movies, Wi-Fi, NFC and Bluetooth. We love having so much packed into such a small DSLR.
Canon EOS 6D Mark II
Initial reaction to the Canon EOS 6D Mark II from some quarters suggested the tonal range and high-ISO noise suppression weren’t as good as from the original 6D, but there’s very little in it and the Mark II has 30% more megapixels under the bonnet. Advertisementhttps://677fe3ed51b5759dab891473293b0346.safeframe.googlesyndication.com/safeframe/1-0-38/html/container.html
Both autofocus systems are massively better, with phase-detection AF rising from 11 points (only one cross-type) to 45 points (all cross-type), while Dual Pixel AF makes for vastly improved autofocus in live view and movie capture.
The latter also benefits from in-camera stabilization, while other improvements include a vari-angle touchscreen and a faster 6.5fps burst rate. All in all, it’s a fabulous camera and the EF 24-105mm IS STM kit lens is well worth having.
LENSES
Canon EF 35mm
The Canon EF 35mm has excellent image quality, compact and lightweight built, and the inclusion of image stabilization makes it a top choice for street photography when using a full-frame. The same combo of highlights also makes it a superb ‘standard prime’ for APS-C format DSLRs, on which it has an effective focal length of 56mm. This gives a very natural viewing perspective, compared with the more wide-angle view that it delivers on a full-frame camera.
Canon EF 70-200mm F/2.8L IS II USM Lens
The Mark II edition of this lens has been the go-to telephoto for top professional photographers around the world, since 2010. It’s so good that the brand new Canon EF 70-200mm f/2.8L IS III USM adds very little. Unlike Canon’s new 70-200mm f/4L IS II USM, there are no improvements in the autofocus and stabilization systems, and the glass remains essentially the same. The key upgrade is that a high-tech ASC (Air Sphere Coating) is applied to the 19th element in the optical path, which further reduces ghosting and flare. Fluorine coatings are also added to the front and rear elements, to repel moisture and grease. It’s still the best Canon-fit 70-200mm lens on the market, and now it’s just a little better.
FLASHGUNS
Canon Speedlite 320EX
Canon Speedlite 320EX II is a versatile flash that includes an LED light on the front that can be used as a modeling light, an AF assist beam during Live View shooting, or to light up nearby subjects in low light for video recording. It will provide up to 4 hours of continuous lighting with fully-charged AA batteries. The 320EX is E-TTL- and E-TTL II-compatible using Type-A EOS cameras, and it has a guide number of 78.7?/24m @100 ISO at 24mm.
Canon Macro Twin Lite MT-26EX-RT
For close-up shooting with a macro lens, a regular flashgun can yield awful results with harsh shadows. This revamped and rejuvenated ‘Macro Twin Lite’ solves the problem. The control unit slots into the hotshoe of a camera, and the two miniature flash heads clip onto a mounting ring that attaches to the front of most Canon macro lenses. Adaptors are available for other lenses with filter threads of between 52mm and 72mm. We like that the redesigned control panel is more intuitive, and that the use of two independent flash heads enables wide-ranging close-up lighting techniques. It beats ring lights which give completely shadow-free results that can look flat and two-dimensional. We also love the high-intensity LED lamps which can be a real help when focusing.
Sony has one of the best mirrorless camera lineups out there and with the constant release of their new mirrorless cameras, the Alpha series that combines the professional functionality in a smaller compact body, each year, there are more options for you to choose from than ever before.
That said, with more options, comes the overwhelming feeling for you to pick the right Sony mirrorless camera that fits the type of travelers you are. That is why I decided to write this guide, to help you choose which Sony mirrorless cameras from the Alpha Series is perfect for you.
Why Choose Sony?
When you are buying a camera from a brand, you are also investing in its ecosystem by buying lenses and accessories and it can be very expensive if you want to switch from one ecosystem to another.
That is why picking the right brand to invest your money in is one of the hardest decisions you will have to make when you are buying a new camera. There are quite a few options out there but no brand has developed as fast as Sony when it comes to mirrorless technology.
Canon in Pakistan may be the #1 camera brand in the DSLR world, but no one can compete with Sony right now when it comes to mirrorless cameras as they have many years of experience developing and refining their cameras while Canon stuck to their guns until only recently where they caved in and released their mirrorless camera lineup.
When it comes to lens selection, Sony used to lack behind the others but not anymore. As Sony mirrorless cameras gained popularity worldwide, so is the lens selection with manufacturers like Sigma and Rokinon jumping on the bandwagon as well as the forever-expanding list of official lenses by GMaster and Zeiss that they created for the Sony E-Mount system.
All in all, if you are looking for a new mirrorless camera to buy, Sony is the way to go.
The Best Sony Camera For Extremely Light Travelers
If you are looking for an affordable yet advanced Sony mirrorless camera packed with features in a compact body, you can’t beat the Sony a6400. The Sony a6400, released in February 2019, comes with a 24.2mp APS-C cropped sensor, a new processor, a 4k video recording capability, extremely fast autofocus, a LOG picture profile system, and many more.
Even though the Sony a6600 is a better model, it is also 1,200 USD, almost 300 USD more than the Sony a6400. The Sony a6600 has the same sensor and processor as the a6400 but without the in-body stabilization which can be compensated with buying lenses that have already come equipped with optical stabilization.
Personally, I think the benefit you gain from getting the newer model is minimal and not worth the 300 USD more that you can spend on lenses instead.
The Best Sony Camera For Light Travelers And Enthusiasts
If you are looking for a compact camera that is as advanced as the Sony a7 III but in a compact size of the Sony a6400, Sony has just released a new camera that bridged the gap, the Sony a7C.
With the Sony a6400, you are getting a compact size but you are sacrificing the quality with a smaller APS-C sensor than what you get from the Sony a7 series. With the Sony a7C, you are getting the a7 series sensor but in a compact body of an APS-C camera, creating a camera that are the best of both worlds.
What do you think of the recommended cameras? Do you own one of these mirrorless cameras and have some experience or thoughts to share? If so, please do not hesitate to let us know in the comments below.
Everything moves at a fast pace in the digital era. What’s relevant today is forgotten tomorrow. Photography is no different. With so many photographers around, publications are constantly delivering new and exciting work to their audience. But as new work emerges, previous work doesn’t need to lose its value.
Photography Projects
Before we get into the work, be aware that all the photography projects you see below have been previously featured on The Phoblographer. We’ve had countless submission over the past 11 years, so picking this list wasn’t easy. But we’re happy with the fantastic work we’re about to share with you. And we know you’ll be happy too!
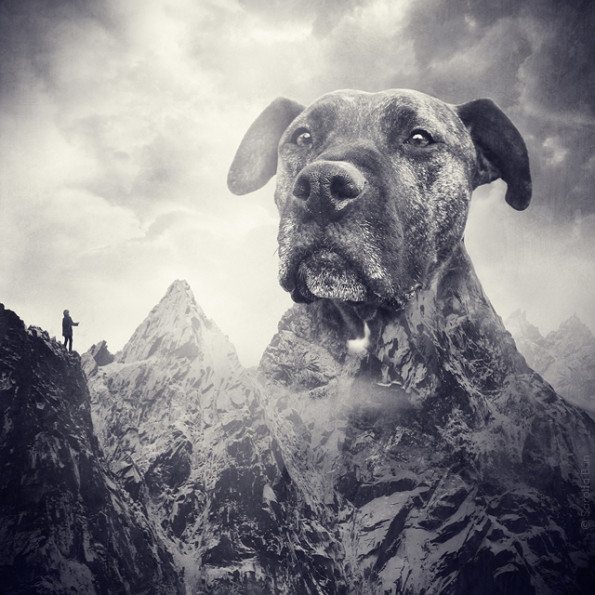
1. Sarolta Ban’s Photography Project Raised Awareness for Animal Shelters
We published the work of Sarolta Ban way back in 2014. Based in Budapest, Ban created dreamlike images that offered the cuteness of animals and the important message of the cause. Ban sold her work in print, and $50 of every order she received went to an animal shelter. Great work for a wonderful cause – we were proud to be a part of it.
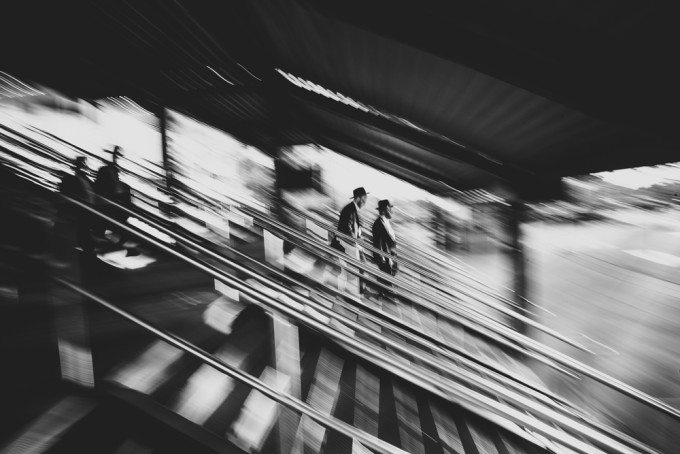
2. Luc Kordas Documents Hasidic Jews with His Photography Project
Luc Kordas‘ wonderful black and white street photography project caught our attention back in 2015. His work began three years before that. In 2012 he began focusing more on the Hasidic community. He told us, “…one day I arrived in Williamsburg and instead of turning left for the hipster part, I turned right to the Hasidic part because that seemed more interesting.” We love how real his work is. There’s no agenda, just pure documentation. Fantastic.
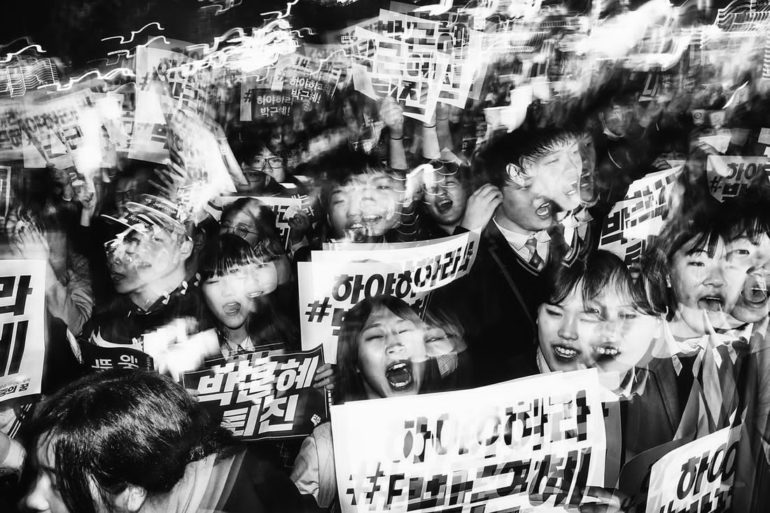
3. Argus Estabrook’s Photography Project Focuses on Hope
Looking at photographs made by Estabrook was like looking at poetry on a page. Sure, he tackles the struggles of life. But he portrays them with so much creativity that the viewer will become gripped by his message. Working out of South Korea, Estsabrook became close and intimate with the nation’s people. Often seen at protests and rallies, his images act as a voice for the millions who want to be heard.
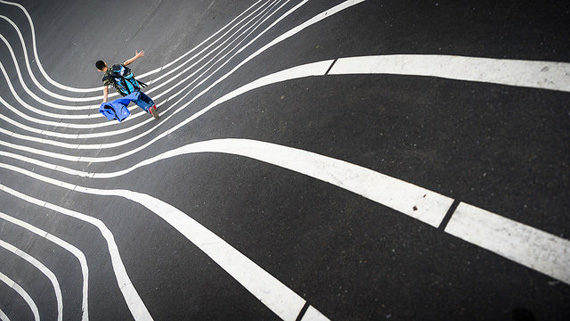
4. Jorge Serra Experiments in a Unqiue Way
It was only a couple of years ago that we first published this work. But coming across it again made it feel it was worth another feature. Serra offers images that take light painting to a new level. They don’t feel cliche, but instead, they’re fresh and unique. He told us, “It started as a hobby that soon developed into a conceptualised way of approaching new things.” That hobby led to great things. The work shown above was part of an album cover for City Number Nine.
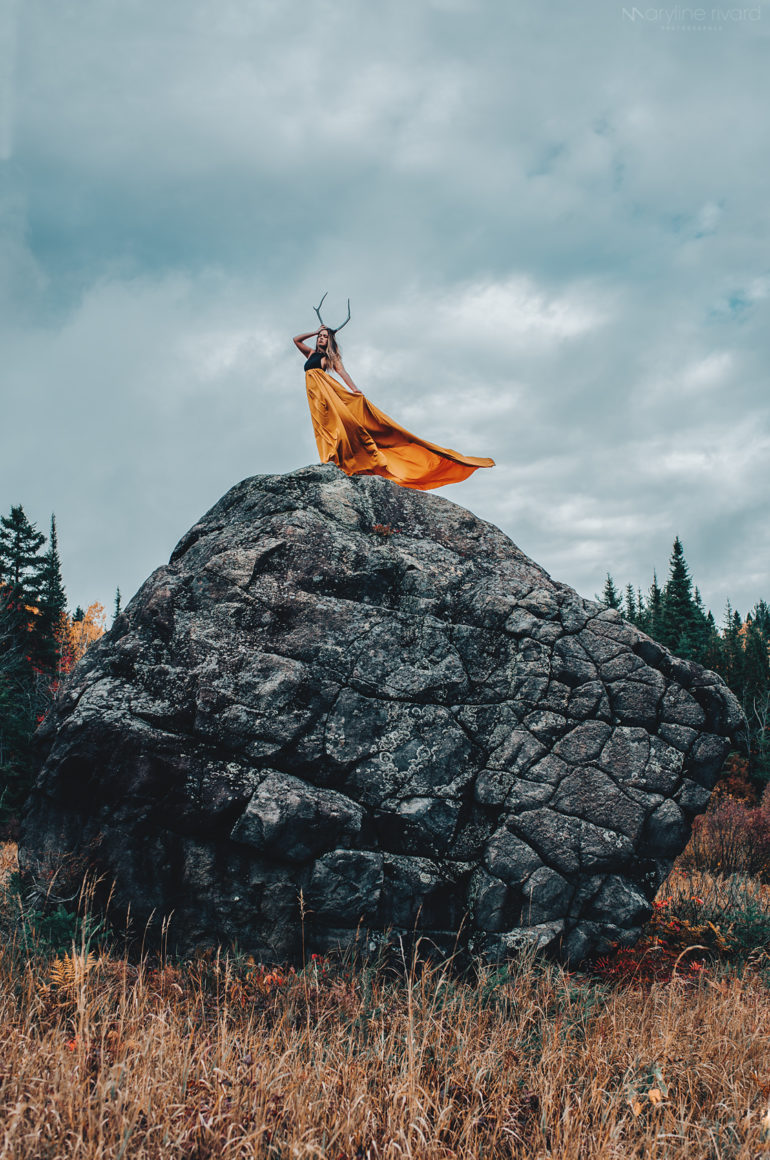
5. Maryline Rivard and Her Conceptual Portraits
Rivard creates majestic self-portraits. On her main motivation for the work, she told us, “I think it is important to show a certain vulnerability in a world where we constantly struggle to show that we are perfect, strong and powerful.” Her camera is certainly a mirror for the range of feelings and thoughts humans have about themselves. We really enjoyed spending time with Rivard’s work.
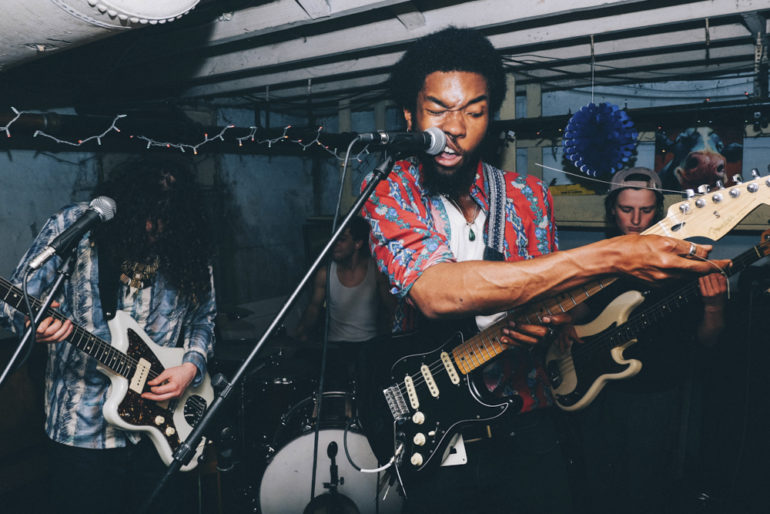
6. Nick Seyler Is Dedicated to Concert Photography
Seyler was only 21 years old when we featured him. Although so young, he offered a body of work that suggested he was a photographer well into his later years. A budding music and concert photographer, Seyler nails the art of documenting the excitement and chaos of the music scene. He told us his main motivation for his work isn’t money, “…I could probably count on my hands and feet the amount of times bands actually paid…” he says. Instead, he does it for his love of music and the community vibe that comes with it.
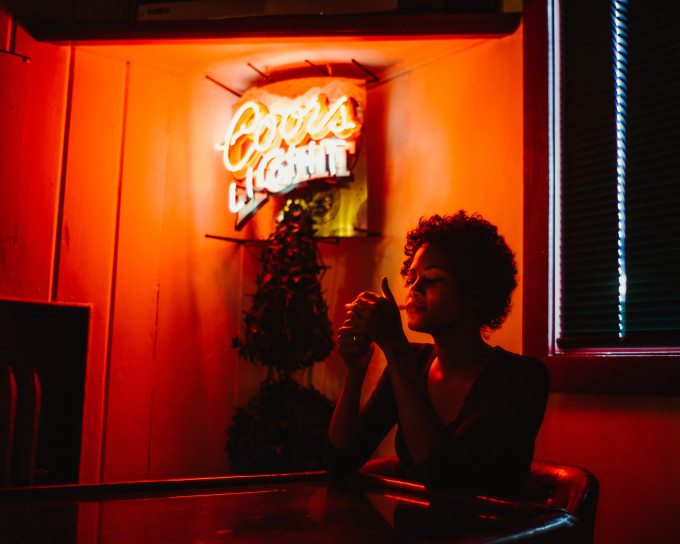
7. Daniel Schaefer Has Worked on Several Photography Projects
Schaefer was still in the early phases of developing his trade back in 2015. But even still, we became instantly attached to his style of portraiture. His frames offer a retro vibe. There’s no over-editing, and his subjects seem to reflect their authentic selves. Strong work, and we’re happy to see he’s still keeping active
For more information or guidance on this you can contact us.
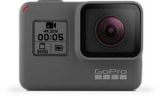
Use an action camera or Osmo Pocket camera/stabiliser for outdoor activities and sports.
On a very tight budget, choose a basic camcorder or a used mirrorless camera or DSLR.
Creative filmmaking
You can choose between four main types of camera for serious low-budget filmmaking: mirrorless/DSLR, prosumer camcorders, pro camcorders, and cinema cameras. Each type has its pros and cons
Mirrorless cameras and DSLRs
Interchangeable lens cameras are mainly designed for serious still photography. But they’re the most affordable way to get into creative low-budget filmmaking.
They have big sensors and lenses compared to camcorders. So they’re better for low light and ‘cinematic’ shallow focus shots. Downsides? You may need accessories to get the best out of them, they’re slower to use than dedicated video cameras, and audio recording can be tricky. But recent mirrorless cameras like the Panasonic GH5 and the G85/G80 have image stabilisation and electronic viewfinders to make video shooting easier.
Professional camcorders
Cameras that have good manual controls, and professional audio inputs and outputs. They can record in pro video formats which are easier to adjust and correct than most video filmed with DSLRs and camcorders. They’re a good choice for news, events and corporate video.
Cinema Cameras
High-quality cameras like the Canon C100 take interchangeable lenses. Their large sensors let you get creative shallow focus effects, like DSLR/mirrorless cameras. But because they’re designed for video, not stills, they’re easier to film with. Most of them have better image quality, especially in low light. They can record in pro video formats that are easy to adjust and correct. Most of them can’t shoot stills.
These are the cameras to consider if you want something straightforward to use at work, in school, at home or for travel.
Consumer camcorders
Small camcorders are some of the most affordable and user-friendly options for shooting videos. They’re useful for beginners, schools and families, though image quality won’t be as good as SLRs or mirrorless cameras. I don’t recommend buying cheap (under $100) camcorders from makers you haven’t heard of.
Compact still cameras
Small ‘point-and-shoot’ still cameras have built-in zoom lenses. Most can shoot Full HD video, and some can record Ultra HD (4k). They’re convenient for travel and families. Video quality isn’t usually as good as DSLRs or mirrorless cameras, though top compacts come close.
Action cameras
These little cameras are tough, but you wouldn’t want to use one as your main camera. You can mount them on bikes, helmets, cars, your body, or even animals. Most of them don’t have screens. The more expensive ones let you monitor the image with a wireless monitor or an iPhone or Android app. You could also consider the DJI Pocket (below).
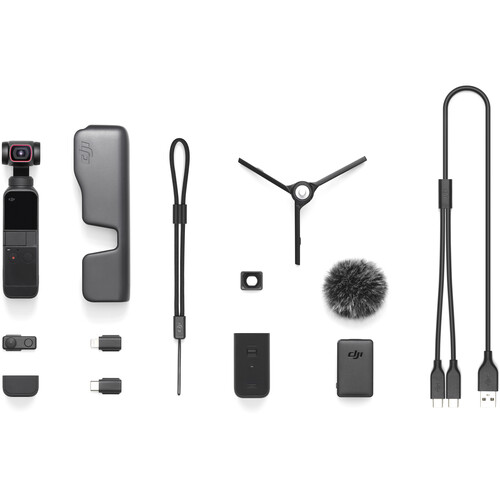
DJI Pocket 2
DJI Pocket 2 tiny combined camera and stabiliser is good for shooting action and events and for flowing, creative camera moves. It can shoot 4K at up to 60fps and Full HD at 240fps. It’s worth considering as an alternative to a basic camcorder, an action camera, or a phone/stabiliser combo.
Choosing a camera: what to look for
Ease of use
Is the camera comfortable to hold? Are the controls easy to use? Can you change the important settings with buttons and switches, or do you have to use menus? If there’s a touchscreen, does it work well? Does the camera have an accessory shoe so you can fit a microphone or light?
Manual control
Can you set exposure, white balance and sound levels yourself, or are they all automatic? These controls might not matter to you now, but you may need them if you get serious about your filmmaking.
Lens
How far does the camera zoom out (wide angle) and zoom in (telephoto)? The wide-angle setting is probably more important as it lets you get close and makes handholding easier. The best way to compare this is find out what the 35mm equivalent is: under 30mm is good, 25mm or less is great. It’s the optical zoom range you should ask about – digital zoom is irrelevant (see bottom).
If the zoom range isn’t very wide, does the manufacturer make wide-angle or telephoto adaptors to fit to the front of the lens?
How close can the camera focus? What’s the widest aperture? (A low number, like f/2 or f/1.7, lets more light in so you can use the camera in dark conditions or get shallow focus effects).
Sound
Is the built-in microphone good? Is there a headphone socket so you can listen to the sound while you film? Can you plug in an separate microphone? (If you want to be able to use pro microphones, you need a camera with three-pin XLR inputs).
Image stabilisation
Image stabilisation can make pictures less shaky. It’s not essential if you’re going to use a tripod or a good camera support, but it’s very useful for shooting handheld. The most effective stabilisation, featured in some new cameras like the Panasonic GH5, combines lens-based optical stabilisation and sensor-based in body image stabilisation (IBIS).
Sensor size
Larger is better – up to a point. The bigger sensors in HDSLRs, mirrorless camerasand large sensor video cameras are are usually better in low light, and let you get shallow focus effects. They also let you use smaller apertures without diffraction softening your image. But for news and events shooters, the greater depth of field you get from a small-sensor camera can be useful.
Mirrorless cameras and DSLRs come in three main sensor sizes: full frame, APS-C and Micro Fourth Thirds (MFT). MFT sensors are the smallest, which means the cameras and lenses are compact and convenient, but less good in low light. APS-C is around the same size as 35mm movie film frames: nice for shallow focus and low light than MFT.
‘Full frame’ cameras give the best low light performance (and ultra-shallow focus, if you need it). But they’re expensive and have bigger, heavier lenses: I don’t really recommend them unless you’re sure you need them.
Recording format
Check that the camera records in a format that your editing program can handle.
You only really need 1080p HD for most uses, but filming in 4K ‘ultra high definition’ has some advantages. 4K footage can look better even when downsized to 1080p, and it also gives you the option of cropping (eg from a mid shot to a closeup) when you edit.
Some cameras can record higher quality video like 10 bit and 4:2:2. These take up more space (and are more demanding on your computer) but they’re easier to correct and adjust when you edit.
Do you need to record broadcast quality footage? That usually means HD footage shot at a bit rate of at least 50Mb/s, with 4:2:2 chroma subsampling (that’s twice as much colour information as the 4:2:0 you get with many camcorders and SLRs). It also requires a minimum sensor size: 1 inch for a single chip, or 1/2 inch for three-chip cameras.
As always, you can ask any questions in the Comments section, below, and we will be more than happy to help you as you prepare for film school. Or contact our experts of Golden Camera team.
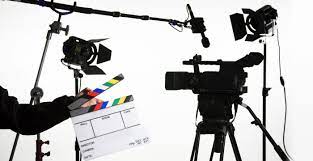
A filmmaker, or film director, is someone who is in charge of making, leading, and developing movie productions. It is a career that allows an individual to use their leadership as well as creative thinking skills to lead and direct major motion pictures or made-for-television films.
A filmmaker spends very long hours making sure the film is being shot in a way that will provide entertainment for the audience and will highlight the actor’s and actresses’ strengths. They will see each film through, from where the film is shot, to how the script will be played out, to what actors and actresses best fit the roles of the characters. The filmmaker also manages the financial end of the production.
Eligibility to become Filmmaker in Pakistan
Candidates who are motivated and have a strong passion for films, theatre and arts can get into the film industry either through talent or by the means of formal education. Aspiring directors/producers can gain experience by assisting renowned directors or by joining school production.
Some producers assist in production houses to build a career. Apart from this a bachelor’s degree in fine arts can enhance one’s knowledge and increase their skill set. Depending upon one’s career interest one can go for a bachelor’s degree or for MFA degree courses.
Music directors and dance directors can join some dance or music school to get some formal training in their field. With the increasing competition, formal training along with talent will help improve their skills which will ultimately increase their employability.
Types of Job Roles Filmmaker
There is no end to the number of job roles available for the filmmaker. Moreover, It totally depends upon one’s career interest, personal choice and ability to opt for a career. Some people enjoy the limelight and creative sight, therefore, opt for careers such as actors, producers, directors etc. Whereas some of them like working behind the scenes like cameraman, technicians. Check out some of the popular film industry job profiles here:
Casting Director: They are the professionals in the film industry who gather a number of actors for a given role in a film. Their role is just not limited to this, as it is necessary for them to stay in close contact with the producer, director, and writer to understand and get an idea of the type of person a given role calls for. As a casting director, it is your responsibility to meet with individuals and shortlist and select the best candidates suitable for the role. They are one of the most important people as they help identify the right actors for the right role which is the basic need of any film. They say- A foundation of a great film is a great actor.
Dancing Director/Choreographer: They are responsible to oversee the production of a dance performance in the film. Their job is to hire dancers, choreographers, run rehearsals, choreograph a song etc. No formal education is required in the respective field but with increasing competition, some formal training or a bachelor’s degree in the same can help one establish their career.
Film Director: They are referred to as the godfather of the film as it is their vision or creative that gets made into a film. Film directors are responsible for multiple job roles, from hiring talents, selecting a script to manage the work of crew and casts, to oversee the work of costume designers to actors to makeup artists. There is a lot taken care by film directors. Rather than a formal degree in this field, a film director must have creativity, interpersonal skills, communication skills and critical thinking to excel in this field.
Film Producer: A film producer is a person who oversees the production of the film. Their main job is to arrange finances for the film. They are with the film from its start once accepted, they secure funding and resources for creating the film.They work with directors and production staff to plan and schedule the filming of the movie. After filming is complete, the producer works with the post-production crew to polish the film. The final stages include screening the movie with test audiences, developing a promotional campaign with advertising and marketing firms, and creating a business plan for distribution is what a film producer does.
Music Director: Their job role is to select music to perform, arrange performances and work with musicians as per the needs of the films. They lead rehearsals and performances. They are often also responsible for many of the administrative details of leading the musical group. Music Directors work closely with directors and producers to understand the demand of the film and deliver as per the same.
Theatre Director: Theatre directors are responsible for many aspects of staging a play, from casting to costumes to performances. They have an extensive knowledge of different, plays, their background, histories etc. Theatre directors who have a bachelor’s degree in the field like literature, history, have an edge over those who don’t
Screenwriter: The screenwriter is the person who writes the script of the film. They create the dialogue, the characters and the storyline of a movie script. The screenwriter is often the most essential person in film production because no movie can start without the script and it is the base of any film.
Employment Opportunities for Filmmaker
Bollywood is the second largest film industry in the world and is flooded with employment opportunities for filmmakers. Mumbai is a hub of most of these opportunities. Check out the top employment opportunities for actors below:
Motion Pictures
Television Industry
Video Industry
Theatre Companies
Stage Shows
Advertisement Agencies
Pay Scale/Salary of Filmmaker
There are no specific salaries or pay packages in the film industry. Well known and renowned music directors, directors, producers, casting directors make a lot of money as compared to the one who has just started their careers.
Books & Study Material to Become Filmmaker
There are no such books which can help you build a career as a filmmaker. However, reading inspirational books, histories, plays can enhance the knowledge of film directors and theatre directors. Filmmaking is a career where you learn more by doing practical work or by assisting some director or producer as it provides you with the exposure and experience which is the most needed in this field.
Pros of becoming a Filmmaker
Film industry provides you with an opportunity to explore your creative sight. You will have the freedom to express yourself and live out your talent! Some people can only dream about it, but you can make a living at it.
Most of the people in the film industry have ambitions, dreams, and mindsets similar to yours. So if filmmaking is your passion, you can connect with like-minded people who share the dream of telling stories and artistically expressing themselves.
One of the best thing about being a part of the film industry is the interesting environment and experiences you get to live. Apart from this, one also gets to travel the world.
Cons of becoming a Filmmaker
At the start of a career in the film industry, you tend to do a lot of odd jobs. Basically, you do everything that no one else wants to do. This situation can get quite frustrating since interns are usually underpaid.
There are tons of passionate artists out there, but no one can guarantee that you will be successful. The truth is that it takes a lot of talent and luck to climb up the career ladder.
You will get to face a lot of criticism in this industry but the tip is to keep going and follow your dreams.
Starting your own photography business is a great way to add a second income or a main income if you work hard. While the photography market in Pakistan is competitive, many photography business owners have been able to find their niche and build a sustainable career. Like most creative endeavors, you need to balance your passion for photography with real business skills in order to be successful.
To build and grow your business, you need both raw talent and a knack for marketing. You should continually be working to improve your craft and evolving your product and work consistently on your own branding, online marketing, and people skills. Without the two, the results will likely just be an expensive hobby rather than a viable full-time business.
The Cost to Start a Photography Businessin Pakistan
The cost varies greatly as a photographer whether you’re starting out or looking to grow your existing business into something larger.
According to professional photographer Austen Diamond, “building slow and smart” will help you stay nimble. Allow the organic growth of your business to fund gear improvements, and avoid debt if possible, he said.
Other things you’ll need to do (that may be free or low-cost):
Market your business via social media (Facebook, Twitter, and Instagram, to start)
Create your business name and logo
Research the best business structure (LLC, S corporation, or other)
Acquire sales tax permit and employer identification number (EIN)
Set up business bank accounts
Find a way to manage client contact information and emails
Choose a spreadsheet and scheduling solution (Google Docs is free)
Establish a referral program
1. Choose your Photography Startup Idea
Every successful startup needs a unique business idea. But photography is a broad niche. So, if you want to start a successful photography business with no money and experience?
You will have to explore several best photography business ideas and target the specific niche. Here are some photography startup ideas you can think about.
Wedding Photography Business
Lifestyle Photography
Tourism Photography
Pet Photography Business
News Photography
Aerial Photography
Real Estate Photography
Photography in Trade Shows
Stock Photography
Freelance Photography
After selecting your specific niche, now you will have to name your startup company. In order to name your startup, you will have to do some brainstorming and think about unique photography business names.
Explore different photography business name ideas and select the right one that exactly matches with your niche.
2. Creating a Photography Business Plan
For many people, writing a business plan is a complete waste of time. But several biz professionals have already recommended that startup business planning always helps the aspiring entrepreneurs to set the specific goals and objectives.
With the help of startup plan, you can easily fulfill startup dream and reach the final destination. All you need is to write a one-page startup business plan and answer the main questions such as your
Goals and objectives
Strengths, weakness, skills and experience
Targeted ideal clients or customers
growth hacking strategies
Financials, startup expenses, and revenues
Don’t waste your time in writing a 5-year detailed business plan. Just go for a 1-page photography business plan and cover the main things.
3. Choose your Business Location
Right business location always plays an important role in business growth and sales. If you want to start this business in your local area then you will have to select your specific location so people can easily find and hire you.
Alternatively, if you have a low budget and can’t afford an office, then you can use the internet to start a business online.
To get potential clients, you will have to join social media sites and freelancing platforms. Furthermore, you can also start a website/blog to showcase your skills and attract customers online.
4. Get Photography Business License
In some countries, registration and licensing are mandatory for some businesses. Registration or getting a license is also a good way to secure a startup business.
If you want to secure your business and get started legally, you will have to register your sole proprietor business. All you need is to visit your local registration office, submit your startup details and get the license.
5. Startup Financing
Financing is a bitter reality of every startup business. To run your business successfully, you will have to do some financial planning. Calculate how much money you need to start your business. For example, calculate your projected
Expenses
Sales
Revenues for next twelve months
If you have enough funds then it’s great. But if not think about how much money is required and how you will raise it?
Writing a Financial plan summary will help you to manage and control expenses in the initial startup phase. You can also track your financial performance on regular basis. If you find something wrong. You can fix it easily.
How to Promote Your Business in Pakistan?
To some extent, promoting a photography business is little bit a difficult task. But thanks to the social media sites, you can promote your startup to thousands of online audience.
Join these sites especially Instagram, Facebook and Twitter and create official pages to promote your startup. Further, you can also promote your photography business via sharing wedding invitation with photos.
After following all the aforementioned steps, hope so you will be able to launch your new photography business easily. Launch it and track your progress.
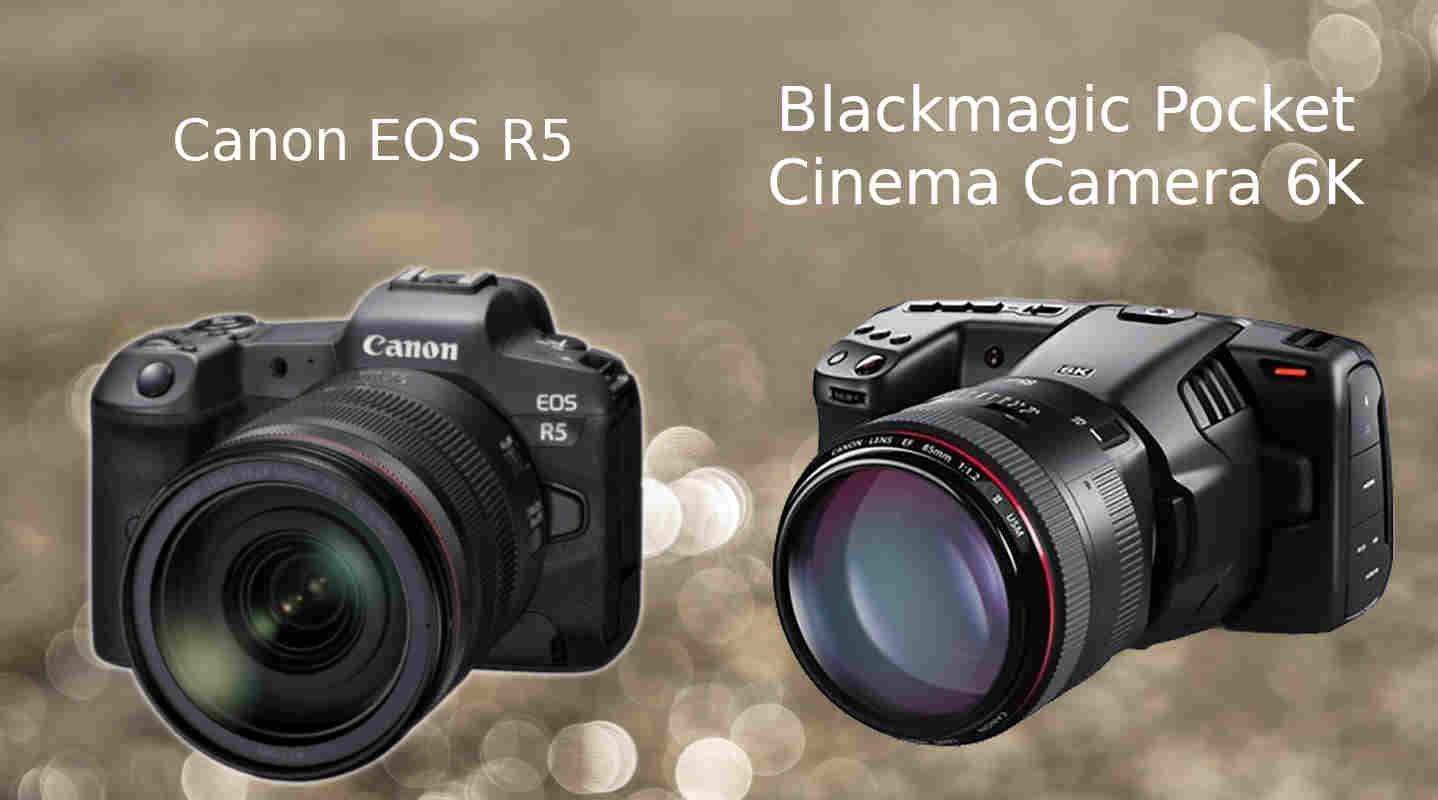
Canon EOS R5 shattered the hybrid camera market by introducing 8K RAW video support into the full-frame mirrorless camera segment. On the other hand, the Blackmagic Design Pocket Cinema Camera (BMPCC) 6K is one of the best portable Super 35mm cameras. While the BMPCC 6K only aims at producing cinematic videos, the mighty Canon R5 is a hybrid 8K camera packed with high resolution. Let’s compare Canon R5 vs BMPCC 6K.
Canon R5 vs BMPCC 6K | Price Comparison
the Canon EOS R5 costs a lot more than the Blackmagic BMPCC 6K camera. The price difference seems justifiable as EOS R5 offers features that were once exclusive to high-end cinema cameras.
BMPCC 6K boasts a Super 35 (23.1 x 12.99 mm), the standard 35mm film equivalent, CMOS sensor whereas the Canon EOS R5 is powered by a full-frame CMOS sensor. The sensor resolution of R5 (8192 x 5464) exceeds the sensor resolution of Blackmagic BMPCC 6K (6144 x 3456).
Although Canon R5 can record 8K RAW videos, note that it can only reach a frame rate of up to 30fps with that resolution. At 4K, it can shoot 10-bit 4:2:2 videos at up to 120 fps and that too internally, that’s pretty impressive. BMPCC 6K on the other hand is capable of recording 6K RAW videos up to 60 fps. So at 6K resolution, you’re getting better frame rates with Blackmagic BMPCC 6K than Canon EOS R5. But don’t forget the difference in sensor size, format, and image processor.
Lens Mount & Lenses
Canon EOS R5 features Canon RF lens mount whereas BMPCC 6K comes with Canon EF lens mount. In effect, BMPCC 6K has a wide range of lenses to choose from compared to the R5. But the lens range for Canon full-frame mirrorless cameras is also increasing rapidly.
Raw Format | Canon R5 vs BMPCC 6K
BMPCC 6K boasts a Blackmagic RAW format, whereas the EOS R5 supports RAW recording in Canon RAW. Blackmagic RAW is a relatively new format in the industry, it’s quite efficient and supports faster playback.
Video Output
Canon R5 can record 12-bit RAW output in DCI 8K at 23.976, 24.00, 25, 29.97p (2600 Mb/s). Also, R5 can store H.265 4:2:2 10-Bit & H.264 4:2:0 8-Bit videos as well (at maximum 120fps for 4K recording). In contrast, BMPCC 6K can record 6144 x 3456 RAW videos at 23.98, 24, 25, 29.97, 30, 50 fps (49 to 483 MB/s) & 6144 x 2560 RAW output at 23.98, 24, 25, 29.97, 30, 50, 59.94, 60 fps (37 to 359 MB/s). In addition, BMPCC 6K can shoot in ProRes as well. However, the video resolution is limited to 4K in ProRes.
BMPCC 6K provides 13 stops of dynamic range whereas Canon R5 offers 12 stops for the same. Having more room in dynamic range is always beneficial for post-production.
Because of the high ISO range, Canon R5 (50-102400) outshines BMPCC 6K (100 to 25,600) when it comes to low light shooting.
Other Features
Canon R5 features a better AF system than that of BMPCC.
BMPCC 6K has a 5″ display unlike the 3.2″ screen in R5. BMPCC’s larger fixed screen gives you the best experience when you are shooting movies.
Unlike Canon R5, BMPCC 6K does not offer an articulating display. If you are a vlogger an articulating display can transform your shooting experience.
Both BMPCC 6K & Canon EOS R5 feature two dedicated storage slots. BMPCC supports CFast 2.0 Card & SDXC UHS-II Card, whereas R5 supports CFexpress Type B & SD/SDHC/SDXC (UHS-II).
Specifications | Canon R5 vs BMPCC 6K
Feature
Canon EOS R5
BMPCC 6K
Sensor Size
36 x 24 mm
23.1 x 12.99 mm (Super 35)
Resolution
8192 x 5464
6144 x 3456
ISO(Extended)
50-102400
100 to 25,600
RAW Support
12-bit DCI 8K at 23.976, 24.00, 25, 29.97p
6144 x 3456 at 23.98/24/25/29.97/30/50 fps (49 to 483 MB/s) 6144 x 2560 at 23.98/24/25/29.97/30/50/59.94/60 fps (37 to 359 MB/s) 5744 x 3024 at 23.98/24/25/29.97/50/59.94/60 fps (40 to 395 MB/s)
ProRes 422HQ 3840 x 2160p at 23.98/24/25/29.97/30/50/59.94/60 fps (22.4 to 110 Mb/s) ProRes 422 3840 x 2160p at 23.98/24/25/29.97/30/50/59.94/60 fps (73.6 MB/s) ProRes 422LT 3840 x 2160p at 23.98/24/25/29.97/30/50/59.94/60 fps (51 MB/s)
Do you want to learn how to take professional photos? Here are some professional photography tips that will show you how to make your pictures look more polished.
To inexperienced photographers, taking a great photo can seem simple: just point and shoot. But anyone who’s tried to learn how to take professional photos knows that there’s a lot more to it than that. From choosing the right subject and setting up a cool composition to finding the best light, it takes a lot of consideration to capture a great photo. If you want to take your photography to the next level, here are some tips to help you learn how to take good pictures. Once you get a hang of these basic pro techniques, it should vastly improve your results.
The best part about knowing how to take professional photos? It leads to new opportunities. The more professional-looking photos you’ll be able to produce, the better your online photography portfolio will look. And the better your online photography portfolio looks, the more photography jobs you will land.
So, let’s dig in!
1. Master the Fundamentals of Composition
Choose a Strong Focal Point
The focal point of a photo is the main point of interest. It could be anything from a tree, to a building, to a person (or their eyes). Finding a strong focal point is one of the fundamental steps of how to take professional photos. So when you’re planning out or setting up a shot, you should stop and ask yourself, “What do I want viewers to focus on?”
Once you know what your focal point is, you can work towards making it as strong as it can be. Many of the composition rules below will help you create an interesting focal point that draws in and holds the viewer’s attention.
Remember The Rule of Thirds
Instead of positioning the focal point in the center of your shot, it can make for a more interesting composition if you follow the rule of thirds. This rule states that you should place the most important elements in your photos off center.
Imagine there’s a tic-tac-toe grid in front of your shot. That means two lines divide your frame into thirds vertically, and two lines divide it into thirds horizontally. You should place the subject and other important elements in your shot along these lines or at one of the four points where they intersect.
It’s one of the easiest ways to learn how to take professional photos. Instead of having all your portraits look like mugshots, this guideline can help you find a better balance between the main subject and background.
Use Leading Lines
Leading lines are line shapes in your shot that can help guide a viewer’s eyes to the focal point. They can be anything that creates a line in your photo, like roads, fences, buildings, long hallways, trees, or shadows.
The trick is using them take a viewer’s attention where you want it to go. That can include drawing their eyes straight to your subject, or leading them on a kind of visual journey through your composition.
The direction of your leading lines can also change the mood of your compositions. For example, vertical leading lines can convey a powerful, imposing mood, while horizontal leading lines tend to be associated with calm and tranquility. For more information on why this technique can help with taking professional photos, check out this guide on how to use leading lines in your photography.
Put Some Thought Into Perspective
Perspective has a massive impact on the composition of any photo. By simply changing the angle or distance you shoot from, you can totally change the mood and meaning of your images.
One simple way to see that is by shooting the same subject from above and below. A bird’s-eye view can make a person in your shot seem small, while shooting from below can make it look like the same person is now towering over you. Shooting from far away can make a person look insignificant, while getting up close and having them fill the frame can convey a sense of power.
So when setting up any shot, spend some time thinking about perspective. Don’t be afraid to walk around your subject to search for interesting angles, and see how drastically it can change the composition’s mood. It will bring you one step closer to perfecting how to take professional pictures.
Create Depth
Finding ways to convey depth is another important step in learning how to take professional photos. If you ignore this rule, your photos can end up feeling very flat and boring. The best way to convey depth is to include some elements in the foreground, middle ground, and background. So for example, instead of shooting your portraits with the person standing up against a wall, bring them closer to the camera, or find a better background with some depth.
Make Your Subject Pop by Using Bokeh
Adding a bokeh effect can help when you are trying to add depth to your photos. Bokeh is the term for that intentional out-of-focus blur effect you can see in a lot of professional photos. Often, photographers use this effect to keep the subject to be crisp and clear while the background is soft and blurry. The result is your subject will seem to really pop out of the background.
One of the simplest ways to do it is to bring your subject right up close to the camera and shoot them in front of a distant background. If you have a zoom lens, even better! Use it at the maximum focal length to decrease the depth of field and create an even stronger bokeh effect. When knowing how and when to use bokeh becomes like second nature, you’re on your way to understanding how to take professional photos.
Frame Your Shot
Framing is another technique that can help you take professional photos. It involves finding something that can act as a natural frame for your composition, and then shooting so your subject is inside it. Some examples include a doorway, an archway, some foliage, or a hole in a wall. This type of framing can help direct the viewer’s attention to your focal point.
Also, if the frame is relatively close to the camera, it can act as a foreground layer that adds depth to your image. Similar to creating a bokeh effect in the background, if you manually focus and zoom in on a subject the middle ground, you can keep the frame out of focus, which makes sure it doesn’t draw attention away from your focal point.
Fill The Frame
When photography students are being taught how to take professional photos, they are often told to “fill the frame.” It’s great advice because if you leave too much space around your main subject, distracting elements in the background can take away from your composition.
So, for example, when shooting a portrait, you might decide to just include the person from the waist up, or, even better, to fill the frame with their face. It makes for a much more captivating and professional-looking photo when all the unneeded extra space is cropped out.
Look for Patterns and Symmetry—Then Disrupt Them
Including patterns or symmetrical elements in your photos can make them more eye-catching. Humans have a tendency to spot patterns, and it’s one reason that including them in your shots can help you learn how to take professional photos.
So keep an eye out for ways to include patterns, symmetry, and repetition of shapes or colors in your photography. Also, including an element that disrupts the pattern makes for an interesting focal point. A simple example would be a picket fence with one broken or missing picket.
2. Make Sure You Have Good Lighting
Making sure your shots are properly lit is an essential part of how to make your pictures look professional, and it’s something that inexperienced photographers often overlook. The first step is making sure you have enough light that your subject is visible. If there’s not enough light, your camera may struggle to capture the details in the scene.
If you happen to be shooting with your camera on automatic settings (which is nothow to take professional photos, but more on that later!), it will use a high ISO setting or extra-long exposure, and you’ll probably end up with grainy or blurry results. And, if you try to brighten things up in Photoshop, you may find you have to make massive adjustments, which also results in a low-quality image.
On the other hand, if there’s too much hard light in your shots, it can ruin your photo with unwanted shadows. So spend some time carefully picking your location and the angle you shoot from to ensure there’s enough light in the scene. Another way to deal with this problem is by using lighting equipment.
3. Get Some Lighting Equipment
Relying solely on available light is not always the right way to take professional pictures. If you do, then you are severely limiting yourself. Professional photographers spend a lot of time planning out lighting and they use a range of lighting equipment. But you don’t need to spend a lot of money to take the lighting in your photography to the next level.
Try Out a Light Reflector
One affordable piece of equipment that will help you manage your lighting is a light reflector. You could pick up a 7-in-1 light reflector for around Rs.5000, and it will give you a lot of options for manipulating light in your shots. These versatile light reflectors come with reversible covers made from different types of reflective materials. For instance, they have silver covers that reflect lots of bright light, white covers that reflect softer light, and black covers for helping you remove light from a scene.
By providing a simple way to start manipulating light in your shots, light reflectors are a big help when it comes to wrapping your head around how to take professional photos.
Take Advantage of Camera Flashes and Diffusers
If you understand that lighting is an important part of how to make photographs look professional, you may be thinking about investing in lighting equipment such as a studio strobe. But don’t overlook your camera flash!
If you shy away from using it because you find the light is too harsh, there are a number of solutions. One of the best options would be to invest in an external flash. External camera flashes, whether used attached to your camera’s hot-shoe or used off-camera, can give you much more flexibility. For one, they enable you to aim the light rather than have it blasting directly on your subject.
This allows you to bounce the light off a nearby surface like a ceiling or wall. The result is that the light is spread out much more evenly and looks less intense. There are also a variety of flash diffusers available for external flashes that will help you soften the light without having to bounce it off a surface.
Many photographers also create DIY solutions for diffusing the light from their flashes, such as using various translucent white plastic containers and cutting them so they fit over the flash.
Use Light to Create Interesting Effects
But there’s a lot more to lighting than just making sure you have enough of it. You can also use light in a variety of interesting ways that can totally change the mood of your photos. Once you get comfortable creating some of these effects, it will help you with figuring out how to make your photographs look professional.
For example, some techniques you could try out include:
Shooting during the golden hour. The golden hour is what photographers call the time just after sunrise and just before sunset. This is when you can capture scenes bathed in golden-hued light—which makes for a great photo. Also, since the sun is low in the sky, things cast very long shadows that can create a dramatic effect.
Create a silhouette. Try shooting a subject in front of a bright light like the setting sun, and manually adjust your camera settings so all you’re left with is a dark silhouette against a background of light. Check out this guide to learn all the ins and outs of silhouettes, Silhouette Photography 101: Master The Basics.
Shoot in hard light. Shooting in areas or times when there’s lots of bright light and shadows can make for an interesting photo with lots of contrast. For example, look for things that cast interesting shadows onto your scene such as window blinds or a fence. Then capture those shapes or patterns created by the shadows as they fall on your subject. For more info on this technique, take a look at hard light photography advice.
4. Learn How to Edit Photos Like a Professional
It’s not only about how to take professional photos. You should also learn how to edit photos like a professional.
Photoshop is the professional photographer’s best friend. Practically any image can benefit from some touch-ups, whether it’s cropping, brightness adjustments, color corrections, or other tweaks.
So it’s worth spending some time learning what the program is capable of. There are lots of helpful tutorials available online, including a bunch on the Adobe website.
If you don’t have access to Photoshop and aren’t looking to spend the money on it, there are many free Photoshop alternatives. One of the most popular is GIMP.
But no matter what photo editing software you use, there’s one rule that remains constant: you should use a light touch when making adjustments. Inexperienced photographers tend to go overboard during editing. If you make too many drastic adjustments, the final result won’t look realistic and your touch-ups will be obvious.
5. Learn Your Camera’s Settings
Relying on the camera’s automatic settings is another thing that will hold you back when it comes to understanding how to take good pictures. While it may work fine at times, you won’t have nearly as much flexibility to get creative with your photography or handle unique situations.
For instance, if you are trying to take a silhouette, your camera may try to capture the wrong details and you’ll end up dimly lit subject against a blown out background. If you’re trying to shoot at night, it may give you an extra-long exposure when you don’t want it, and you’ll end up with a blurry mess. So spend some time familiarizing yourself with your camera’s settings, because it’s a critical step in learning how to make pictures look professional.
6. Pick Up a Tripod
We’ve already covered some lighting equipment, but there’s one more piece of photography gear you should definitely consider adding to your arsenal if you want to know how to take professional photos.
You might think you don’t need a tripod if you have a steady hand and are comfortable with handheld shots. But a tripod allows you to try a variety of shooting techniques that you can’t do without one.
A tripod also lets you set up your shot and then take care of other aspects of the scene while keeping your camera ready to go. For example, you might want to line up a shot and then speak to a model, make lighting adjustments, or just wait for the perfect moment.
7. Upgrade Your Gear
Using the professional photography tips above, you should be able to vastly improve your results without spending any money. However, if you’re working with sorely outdated equipment and have the budget for some new gear, it might be time to upgrade your camera, lenses, and accessories. For some help deciding between all the options out there, take a look at these guides: