Blog
Basics of Film Photography – Explained 2024
In recent years, many photographers have embraced film photography, bringing a classic touch to their work despite the evolution of digital cameras. Film photography’s distinctive charm sets it apart from its modern counterparts.
Capturing stunning stills with a film camera demands skills that differ significantly from those in digital photography. Scroll down this blog to learn the basics of film photography and explore everything related to this timeless art form.
Understanding Your Equipment
Mastering film photography starts with understanding your film camera equipment. With various types and formats available, each offering a unique shooting experience, getting to know your camera inside and out is essential. This knowledge is crucial for capturing those unforgettable moments in your life and will enhance your film camera experiment.
It’s important to note that the best film photography doesn’t always come from the most expensive or aesthetically pleasing camera. Many film photographers have four to five favorite cameras and an additional four to five backups, each chosen for various shooting scenarios.
Types of Film Cameras
Users can pick from many types of film cameras. Read about them below:
Single-Lens Reflex (SLR) Cameras:
- The most common type of film camera.
- Equipped with a mirror and prism system, they allow you to view the scene through the lens.
- Ideal models include the Canon AE-1, Olympus OM1 (my first SLR!), and the Nikon F series.
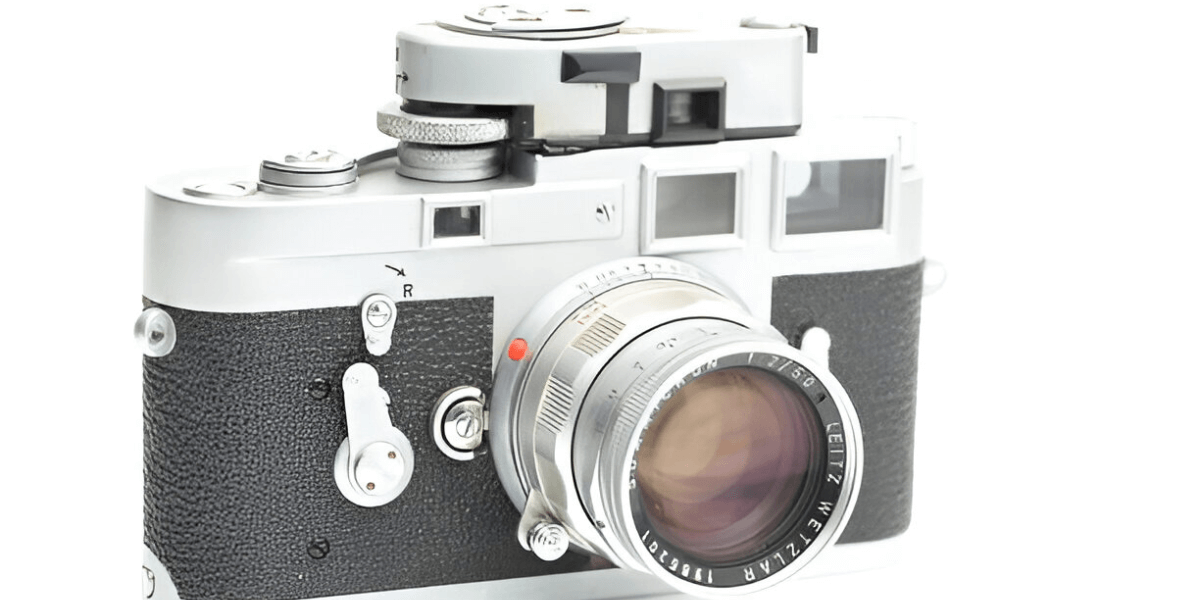
Rangefinder Cameras:
- It is compact and ideal for street and travel photography.
- They are lightweight and less prone to camera shake, but they can be challenging to compose on the go because they do not focus through the lens.
- The difference between the lens and viewfinder is significant for close-up subjects. Examples include the Leica M series.
Point-and-Shoot Cameras:
- User-friendly and straightforward, making them great for beginners or casual shooting.
- Popular models include the Olympus Stylus Epic and the Yashica T4.
Twin-Lens Reflex (TLR) Cameras:
- Featuring two lenses—one for composing and one for capturing the image.
- These cameras typically use medium-format film, offering fewer shots per roll but larger image sizes.
- Notable examples are the Rolleiflex and Yashica Mat cameras.
Choosing The Right Camera
Choosing the right camera depends on your goals. If you want to know how to start film photography, an SLR is ideal due to its versatility and ease of use. For street photography enthusiasts, a rangefinder or point-and-shoot might be more suitable.
Medium-format cameras offer superior image quality but require a different approach. Remember, you don’t need to find ‘the one’ camera, as different situations may require other types.
Learning Manual Settings
Many film cameras require manual adjustments, so familiarize yourself with settings like ISO, shutter speed, and aperture. These controls help manage exposure and allow you to achieve the best photographic results. Read this guide on film photography and how you have to play with the controls:
Achieving Correct Exposure
Fortunately, the exposure triangle functions similarly in both analog and digital cameras. So, if you’re adept at manipulating stops of light in a digital system, you’re well-prepared!
The main difference with film cameras is that ISO is set by choosing the film beforehand, not by adjusting a dial. You can’t change ISO between photos until you finish the roll, so choose your ISO carefully for the entire film.
Another consideration is that many film cameras lack built-in light meters. If your camera doesn’t have an integrated light meter, use these tips to ensure balanced exposure in your photos:
Use an External Light Meter:
Handheld light meters offer precise readings and can often be found in the second-hand market for film cameras. Newer models incorporating modern electronics and plastic molding are available from various suppliers.
Light meters measure the light in your scene and recommend optimal settings for ISO, shutter speed, and aperture to ensure accurate exposure.
Sunny 16 Rule:
A useful rule for daytime shooting is the Sunny 16 rule, which is easy to apply on bright, sunny days.
Here’s what to do:
- Set your aperture to f/16.
- Adjust the shutter speed to match your film’s ISO.
This method provides good exposure for most situations and films and is quicker than using a light meter.
Bracketing:
It involves taking multiple photographs of the same scene at varying exposures. For example, you might capture one shot at the recommended exposure, another with underexposed settings, and a third with slightly overexposed settings.
Dealing with Different Lighting Conditions
Lighting conditions can greatly affect your exposure settings. Learn about how to handle light in some common scenarios:
Bright Sunlight:
- Use a low ISO film (100-200).
- Opt for a fast shutter speed (1/500s or faster).
- Set the aperture to a smaller value (f/11 or f/16).
- Recommended films: Ilford FP4 (black-and-white) or Kodak Pro Image (color).
Overcast Days:
- Use a medium ISO film (400).
- Choose a moderate shutter speed (1/125s or 1/250s).
- Open the aperture wider (f/5.6 or f/8).
- Recommended films: Kodak Tri-X (black-and-white) or Ultramax (color).
Indoor Lighting:
- Use a high ISO film (800 or higher).
- Select a slower shutter speed (1/60s or slower).
- Choose a wide aperture (f/2.8 or wider).
Use a tripod to avoid shaky shots. Recommended films: Cinestill 800T, Kodak Portra 800 (color), or Ilford Delta 3200 (black-and-white).
By mastering the exposure of the film camera, you ensure your photos achieve the perfect balance, avoiding both overly dark and excessively bright results.
Picking Up The Film Types And Formats
Before starting film photography, you need to know about the types of film photography. Read about it below:
Film Types
- Color Film: A popular choice for film photography, color film is easy to use and can be processed at any standard photo lab. It comes in various styles to meet different needs.
- Negative Film: This widely used color film is cost-effective and readily available. It’s simple to print and view on a screen, making it a convenient choice for many.
- Slide Film: Though less common than negative film, slide film offers superior image quality. It’s more expensive and less versatile, but ideal for those seeking the highest image clarity.
- Black-and-White Film: Less popular than color film, black-and-white film provides a distinctive look and feel. While it can be processed at most standard photo labs, it costs more.
Film Formats
Read about the film formats below:
- 35mm:
35mm is one of the most popular formats for general photography. It’s small, lightweight, and easy to carry.
- 110 Film:
This is a small cartridge film format. Lomography still produces this type of film, but we do not develop or scan it.
- 120 Film (Medium Format)
120 film is larger than 35mm but still small and weighs very light. It produces top-quality images as compared to 35mm film.
- Large Format Film (4×5, 8×10, or larger)
This film is for cameras with a large format that shoots sheet film. It is individually loaded and shot one image at a time. 8×10 film is the biggest of the three standard formats. It’s heavy and difficult to carry, but it produces the highest-quality images.
- Instant Film (Polaroid & Fuji Instax)
Polaroid and Fuji Instax are popular choices for instant films. Polaroid, though more expensive, delivers the classic instant film aesthetic. Fuji Instax, on the other hand, is more affordable and often offers better contrast and more vivid, accurate colors. Both are great for capturing spontaneous moments and adding a fun touch to your photography.
Developing A Film In 8 Steps
Once you’ve completed a shoot with a full roll of film, it’s time to develop it. If you can access a darkroom with proper lighting and ventilation, you can send the film to a lab or process it yourself. Many photographers prefer to develop their film for personal satisfaction and control over the process.
For this, you will need this equipment:
- Bucket
- Film spool
- Thermometer
- Cups
- Chemical developer
- Chemical fixer
- Film developing tank
- Dish soap
- Clips
- Timer
Follow these steps to develop your film.
Preparing the Film Bath
- Fill a large bucket with water, ensuring it’s not hot.
Mix Your Chemicals
- Fill a cup with 10 oz of water from the bucket.
- Add 10 ml of developer and stir.
- Fill a second cup with water from the bucket.
- Add fixer and stir.
Putting the Film into the Developing Tank
- In complete darkness, open the film canister and wind the film onto the spool.
- Place the spool into the developing tank and close it tightly.
- You can now turn the lights back on.
Adding the Developer
- Pour the developer into the developing tank.
- Let it sit for 3 minutes and 45 seconds, agitating every 30 seconds.
- Pour out the developer.
Adding the Fixer
- Quickly pour in the fixer.
- Let it sit for one minute, agitating throughout.
- Pour out the fixer.
Rinsing the Film
- Open the developing tank.
- Remove the spool and rinse the film in the bucket for 1 to 2 minutes.
- Add a drop of dish soap and rinse for an additional minute.
Hanging the Film to Dry
- Clip the film on a line to dry. Allow it to sit for 60 minutes to dry completely.
Develop Your Prints
- After developing your negatives, create a contact sheet.
- Enlarge your photos and develop your prints.
Shooting Conditions For The Film Cameras
Many photographers prefer film photography, and they ride along with analog cameras. Film photography is a pretty good format to use when:
- For outdoor use, analog cameras can produce vivid colors with proper and finer grains in natural light without digital editing.
- For B&W film, black-and-white images allow more leniency in the darkroom than color film, which often amplifies a photo’s details.
- Film photography is all about experimentation, whether for fun or as a hobby. You can pull off many different techniques. You can play around with the aperture control on the analog camera or with the color temperature in the darkroom.
Best Film Cameras That You Can Get
Read about the best film cameras that you can get for your film photography:
Leica M-A
Renowned in the photography world, the Leica M-A is celebrated for its fully mechanical design. It features a bright, clear viewfinder and precise rangefinder focusing, all within a top-notch, robust build. This camera is a favorite among purists and those who appreciate the artistry of film photography.
Nikon FM2
The Nikon FM2 is known for its reliability, durability, and innovative features. Its rugged metal construction, smooth mechanical operation, and compatibility with Nikon’s legendary F-mount lenses deliver exceptional image quality. It’s ideal for both studio portraits and street photography.
Canon AE-1
A famous 35mm SLR camera, the Canon AE-1 was the first to incorporate a microprocessor. Its user-friendly design, advanced features like aperture priority auto exposure, and easy controls make it a popular choice among enthusiasts and amateurs.
Hasselblad 500C/M
Perfect for medium-format photography, the Hasselblad 500C/M offers exceptional image quality and a modular design. It features interchangeable lenses, viewfinders, and film backs, making it ideal for professional photographers and discerning enthusiasts working in landscapes, portraits, or fashion.
Pentax K1000
Often praised as one of the best entry-level film cameras, the Pentax K1000 stands out for its simplicity, reliability, and affordability. It includes manual exposure controls, a TTL metering system, and compatibility with many Pentax K-mount lenses. Ideal for learning the basics of film photography without a high investment.
Olympus OM-1
The Olympus OM-1 is a compact, lightweight 35mm SLR camera with top-notch performance and portability. Introduced in the early 1970s, it boasts a sturdy build, excellent optics, and a sleek, ergonomic body. With intuitive controls and a bright viewfinder, it’s well-suited for street photography, landscapes, and portraits, and is compatible with legendary Zuiko lenses.
Final Thoughts
Now that you know its benefits, it’s exciting to see why you should try film photography. With full control over manual settings, you can capture images exactly as you envision. Start at the beginner level, learn and adapt, and advance your skills over time. Embrace the journey from novice to expert, and enjoy the unique experience that film photography offers.
However, if you are a beginner in photography, you can buy a DSLR camera in Pakistan from Golden Camera. You will be able to test new skills on your camera, and that’s how you can implement them on film cameras