Over the years, smartphone cameras have certainly improved, and companies are excited to bring in cutting-edge technologies to meet the needs of users worldwide. However, we shouldn’t overlook the amazing advancements made by camera manufacturers in their point-and-shoot cameras. They’ve been dedicated to enhancing their products for quite some time, introducing fantastic features and advanced components to stay ahead of the competition.
Stick around on this blog, and you’ll discover which is better for photography: a point-and-shoot camera or a smartphone. We invite you to explore this topic further in the blog.
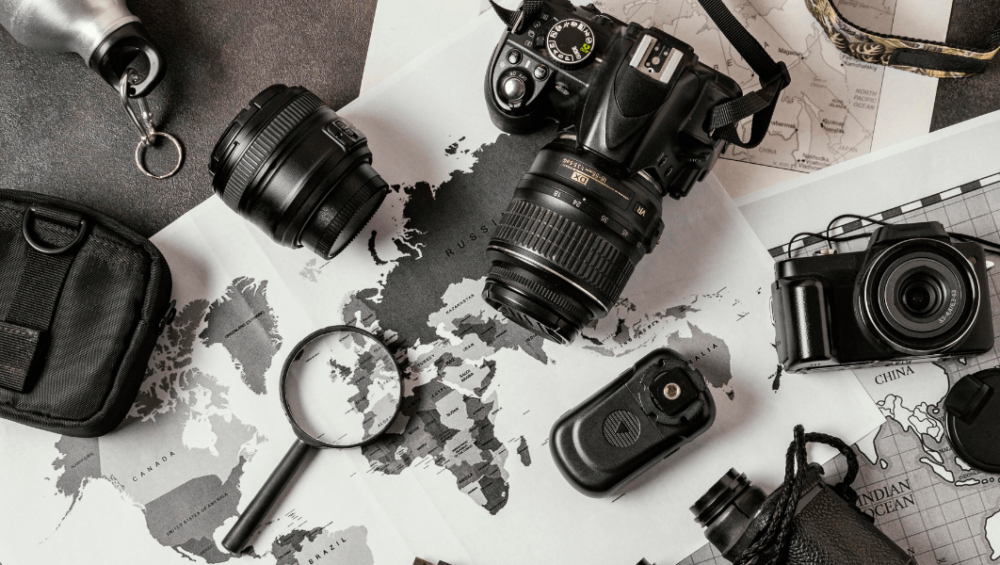
Point-And-Shoot Cameras
Point-and-shoot cameras make photography so easy and enjoyable. With everything from focus to exposure happening automatically, all you need to do is aim and click the button, and the camera takes care of the rest. These cameras come in a variety of styles, from affordable throwaways to sleek pocket-sized digital.
Even some high-end models feature a point-and-shoot option, letting the camera handle all the settings for you. While there are some settings to accommodate different lighting conditions, like bright sunlight and dusk, these cameras don’t allow for manual adjustments of aperture, shutter speed, or focus, leaving you free to enjoy the moment and capture beautiful memories.
If you are planning to get point-and-shoot cameras for your camera bag, then you can get them from Golden Camera.
Optical Zoom
Point-and-shoot cameras have optical zoom, enabling physical closeness to subjects without losing image quality. In contrast, smartphone cameras typically rely on digital zoom, leading to detail loss.
Image Quality In Low Light
Point-and-shoot cameras usually feature larger image sensors than smartphones. This larger sensor enhances low-light performance, yielding clearer images with less noise.
Manual Controls
Point-and-shoot cameras can really enhance your photography experience by providing more manual control over settings like aperture, shutter speed, and ISO. This added flexibility is a fantastic advantage for photographers looking to express their creativity in every shot.
Dedicated Shooting Modes
Point-and-shoot digital cameras are wonderful tools that come with a variety of shooting modes tailored for different scenarios, like capturing stunning landscapes, beautiful portraits, or intricate macro details. While smartphones also offer similar features, dedicated cameras often bring more advanced options to enhance your photography experience.
Specialized Features
Many point-and-shoot cameras offer exciting features that you won’t typically find in smartphones. These include waterproof and rugged designs, built-in GPS for easy navigation, and cool shooting modes such as time-lapse and slow-motion, perfect for uniquely capturing those special moments.
Longer Battery Life
These cameras typically come equipped with larger batteries than smartphones, allowing you to enjoy longer shooting sessions without the worry of running out of power. These point and shoot cameras are fantastic companions for your travel photography adventures. With their extended battery life, you can use them all day and still have some energy left for when those perfect moments arise.
Better Ergonomics
Point-and-shoot cameras are made with photography lovers in mind. They come equipped with ergonomic grips and handy buttons for functions like zoom and shutter release, making them a breeze to use for long periods, especially when compared to smartphones.
No Distractions
A dedicated camera can truly help you escape those annoying distractions from smartphones, such as notifications, calls, and other apps. This allows you to fully immerse yourself in capturing those precious moments. If you’re still pondering whether smartphones or point-and-shoot cameras are better for photography, we’re here to reassure you that you’ll be able to concentrate entirely on your shots without any interruptions.
Backup Device
Using a separate device for photography gives you peace of mind, ensuring that you always have a backup for capturing memories. This way, even if your smartphone is unavailable or runs low on battery, you won’t miss a chance to take great pictures.
Legacy And Aesthetics
Many people cherish the nostalgic charm and tactile experience that a dedicated camera brings. Plus, using a traditional camera can express a more serious or professional vibe based on the situation.
Although smartphones are the popular choice for casual snapshots, point-and-shoot cameras still provide unique benefits for those who value specific features and want more control over their photography journey. You can get the best point-and-shoot camera for your experience and level up your photography. Check out our website for that.
Smartphone Cameras

Mobile photography opens the world of photography to everyone. You no longer have to master the complex buttons, dials, and settings of a traditional camera. Simply launch your camera app and snap away. Although capturing a photo is super easy, diving into the details of your phone’s camera specifications can sometimes feel a bit tricky.
Resolution (MP)
A camera’s resolution is in megapixels (MP), measuring the tiny units, or photosites, that collect light on the sensor. One megapixel is roughly one million pixels. Therefore, a 12-megapixel camera captures about 12 million pixels. At full resolution, your photos hold the same number of pixels as the sensor. Resolution serves as a simple indication of photo size.
Pixel Size (μm)
Camera image sensor pixels are tiny. In fact, on modern smartphones, each pixel is just a fraction of the width of a single human hair. When you check out the pixel size, you’ll often see it noted in μm, which stands for micrometers. To give you a better idea, one micrometer equals one one-millionth of a meter. For instance, the impressive 50-megapixel primary camera sensor on the phone features pixels sized at 1.2 μm.
Understanding pixel size is essential because larger pixels allow a camera to perform better in dim lighting. That’s right. Bigger pixels have a larger area, allowing more light in. Many phone cameras have a clever trick to deal with their tiny pixel size: they use a technique called pixel binning.
This method involves combining adjacent pixels digitally to create larger, more light-sensitive units, even if it means sacrificing a bit of resolution. A flagship phone that has a 50-megapixel primary camera with 1μm pixels. But with pixel binning, it can blend groups of four pixels to capture photos at 12.5 megapixels, using artificially large 2μm pixels that really enhance low-light performance.
Sensor Size
In mobile photography, sensor size is crucial, as larger sensors collect more light and excel in low-light situations. They accommodate more pixels while maintaining high light sensitivity. Comparing a one-inch 50-megapixel sensor to a smaller 1/1.2-inch sensor, the larger one generally outperforms in low light.
Did you know a fraction denotes sensor sizes? For example, there’s a phone with a 1/1.56-inch sensor. Although it seems odd, it’s merely a fraction. A 1/1.56-inch sensor measures about 0.64 inches corner to corner (1 ÷ 1.56 = 0.641).
Aperture (F/Stop)
A camera’s aperture acts like a doorway for light, allowing it to reach the image sensor and create beautiful pictures. Measured in f-stops (e.g., a phone with f/1.8), a larger aperture lets in more light.
Aperture notation is unique, representing a fraction: the ‘f’ in the numerator indicates the lens’s focal length and diaphragm size. For mobile photography, a smaller denominator indicates a larger opening. Thus, a camera with an f/1.8 aperture captures brighter photos and has a shallower depth of field than an f/2.8 aperture.
Aperture significantly affects a camera’s light sensitivity. A larger opening collects more light, making it excellent for low light and influencing the depth of the field. A narrower aperture makes out-of-focus areas appear sharper, adding an artistic effect.
Field Of View
A smartphone camera’s field of view is the area it captures, measured in degrees. In mobile photography, this term is common for ultra-wide secondary cameras. For example, a phone with a 120° ultra-wide shooter. Imagine drawing a triangle between the two ends of this field; the angle at the sensor corner will be 120°.
Having a larger field of view allows you to capture more of a scene. For instance, there’s another phone that features a 125.8° ultra-wide lens, enabling a broader picture than other phones. A wider field of view also makes nearby objects appear pronounced, adding a fun twist to your shots.
Image Stabilization (OIS, EIS)
Image stabilization is just what it sounds like, and it’s a fantastic technology designed to keep the pictures you capture nice and steady, helping to reduce those pesky blurs caused by small camera movements. There are two different types of image stabilization: optical (OIS) and electronic (EIS).
In the world of mobile photography, optical image stabilization achieves this by gently adjusting your camera’s lens to counteract any movement from your phone. If you ever shake your phone with OIS, you might hear a soft clicking sound near the camera module; that’s just the lens making those little adjustments.
On the other hand, electronic image stabilization takes a digital approach by cropping in on the image to stabilize it. You might notice this when you switch from taking photos to recording videos. When your phone detects any movement in one direction, it cleverly compensates by shifting the image in the opposite direction, keeping your videos smooth and enjoyable.
Autofocus (Laser AF, PDAF)
Autofocus adjusts focus automatically on phones. Standard autofocus identifies contrast between pixels, which helps determine focus. Two other common types are laser autofocus and phase detection autofocus (PDAF).
Laser autofocus emits an invisible light beam that bounces off the subject, letting the phone calculate distance by timing the reflection’s return. PDAF uses pairs of pixels to ensure even light distribution. If there’s uneven light, it indicates the image isn’t in focus. The phone shifts the lens accordingly to sharpen the image.
Comparison Table
Read about the point-and-shoot cameras vs smartphone cameras. Check it below:
| Feature |
Point-And-Shoot Cameras |
Smartphone Cameras |
| Ease of Use |
Automatic settings for effortless photography |
Simple point-and-shoot experience with built-in apps |
| Optical Zoom |
Uses optical zoom for better image quality |
Mostly relies on digital zoom, leading to detail loss |
| Image Quality in Low Light |
Larger sensors improve low-light performance |
Pixel binning enhances low-light photos, but quality varies |
| Manual Controls |
Some models offer manual settings for flexibility |
Limited manual control, mostly automated adjustments |
| Dedicated Shooting Modes |
Various preset modes for landscapes, portraits, and macro |
Built-in modes, but often less advanced than dedicated cameras |
| Specialized Features |
Waterproof, rugged designs, GPS, slow-motion, time-lapse |
Advanced AI processing, portrait effects, night mode |
| Battery Life |
Typically, it takes longer than smartphones due to dedicated power |
Battery drains faster due to multiple smartphone functions |
| Ergonomics |
Comfortable grip, physical buttons for quick access |
Flat design, touchscreen interface, less ergonomic for long use |
| Distraction-Free |
No notifications or apps to interrupt photography |
Calls, messages, and notifications can be distracting |
| Backup Device |
Useful as a separate camera when the phone is unavailable |
All-in-one device, but battery constraints can limit availability |
| Legacy & Aesthetics |
Classic camera feel, professional or nostalgic appeal |
Sleek, modern design with computational photography |
| Resolution (MP) |
Varies depending on model, often lower than smartphones |
High megapixel count for detailed images |
| Pixel Size (μm) |
Larger pixels improve low-light performance |
Pixel binning combines smaller pixels to enhance brightness |
| Sensor Size |
Larger sensors capture more light for better image quality |
Compact sensors, but computational photography enhances results |
| Aperture (f/stop) |
Fixed or variable aperture for light control |
Small f-stop values allow better low-light photography |
| Field of View |
Standard zoom range with wide-angle options in some models |
Ultra-wide, standard, and telephoto lenses available |
| Image Stabilization |
Optical stabilization in some models |
Optical (OIS) and electronic (EIS) stabilization for smooth images |
| Autofocus |
Contrast detection or phase detection autofocus |
Laser autofocus, PDAF, and AI-enhanced focus for speed and accuracy |
Take a look at this comparison table. It shows that point-and-shoot cameras offer some great benefits over smartphones. If you’re thinking about getting one, we’re here to help ensure you have a fantastic experience using it.
Final Thoughts
Point-and-shoot cameras and smartphones each offer unique strengths for different photographers. If you prioritize convenience, AI features, and easy sharing, smartphones are ideal. Conversely, if you prefer optical zoom, manual controls, and focused shooting, a point-and-shoot is a dependable choice.
Your decision ultimately depends on your photography style and needs. While smartphones advance, dedicated cameras remain essential for enthusiasts desiring more control. Don’t wait; get the best price on point-and-shoot cameras in Pakistan from us.