
Blog
Top 4 Camera Lens Cleaning Kit

Published: 11 April 2025 Last Updated: 13 August 2026
Every photographer invests time in choosing the right camera body and lenses, but many overlook one simple habit that directly impacts image quality: keeping the lens clean. A clean camera lens plays a major role in image sharpness, color accuracy, and overall photo quality. Dust, fingerprints, oil, and airborne particles can reduce contrast and create unwanted spots, especially when shooting in bright light.
Using the right cleaning tools, proper techniques, and a reliable lens-cleaning solution helps protect delicate lens coatings while extending the life of your photography equipment.
How Dust and Pollution Affect Camera Lens Performance
A clean camera lens delivers sharper images, better contrast, and fewer distractions in your final shots. Dust, fingerprints, oil, and environmental grit quickly settle on glass surfaces. In places with high airborne particles, this becomes a daily concern.
According to IQAir’s 2024 World Air Quality Report, Pakistan ranked third among the most polluted countries, with an average PM2.5 concentration of 73.7 micrograms per cubic metre, nearly 15 times the World Health Organization guideline of 5 µg/m³. Cities such as Lahore frequently record elevated levels of fine particles that settle on optics during outdoor shoots.
This makes proper lens maintenance especially important for photographers who work in outdoor environments. Fine particles may appear harmless, but they can mix with moisture and fingerprints on the lens surface, creating marks that affect light transmission and image clarity.
Camera manufacturers take this seriously enough to build entire service programs around it. According to Canon’s official guidance for camera care, users should avoid harsh materials, excessive pressure, and unsuitable cleaning products because modern lenses have delicate optical coatings that help reduce reflections and improve light transmission.
Why Does a Camera Lens Need Regular Cleaning?
Camera lenses are built with multiple optical elements and specialized coatings. These coatings help improve image quality by reducing glare and unwanted reflections. However, the front element is constantly exposed to the surrounding environment, making it vulnerable to contamination.
Common problems that affect lenses include:
1. Dust and Small Particles
Dust particles can collect on the front element, rear element, or around the lens mount. A small amount of dust inside a lens usually does not affect image quality, but surface dust can create problems when it combines with moisture or oil.
2. Fingerprints and Oil Marks
Fingerprints are among the most common causes of lens contamination. Skin oils can create a thin layer on the glass surface that reduces contrast and creates hazy images, especially when shooting against bright light sources.
3. Water Spots and Moisture
Rain, humidity, and accidental splashes can leave mineral deposits on the lens surface. These marks may become harder to remove if they remain for long periods.
4. Environmental Residue
Photographers working outdoors may encounter pollen, smoke residue, salt particles near coastal areas, or fine dust. These contaminants require careful removal because rubbing them directly into the glass may create scratches.
Top Signs Your Camera Lens Needs Cleaning
Cleaning a lens after every shoot is unnecessary. In fact, cleaning too frequently increases the chance of accidental scratches if done improperly. Instead, inspect the lens carefully under good lighting before cleaning.
Common signs include visible fingerprints, oily smudges, dried water spots after rain, dust that remains after using a blower, pollen, sand particles, salt residue after beach photography, and marks that appear when reviewing photos.
A flashlight held at an angle can make these contaminants easier to identify. If only a few dust particles are present, using a blower may be enough. Wiping the lens without removing loose debris first can drag particles across the glass and create fine scratches.
What to Use to Clean a Camera Lens: The Tools That Actually Matter
A genuinely useful cleaning kit is built around a small set of tools, each suited to a different stage of the cleaning process, and the mistake most beginners make is skipping straight to a cloth or solution before removing loose dust first.
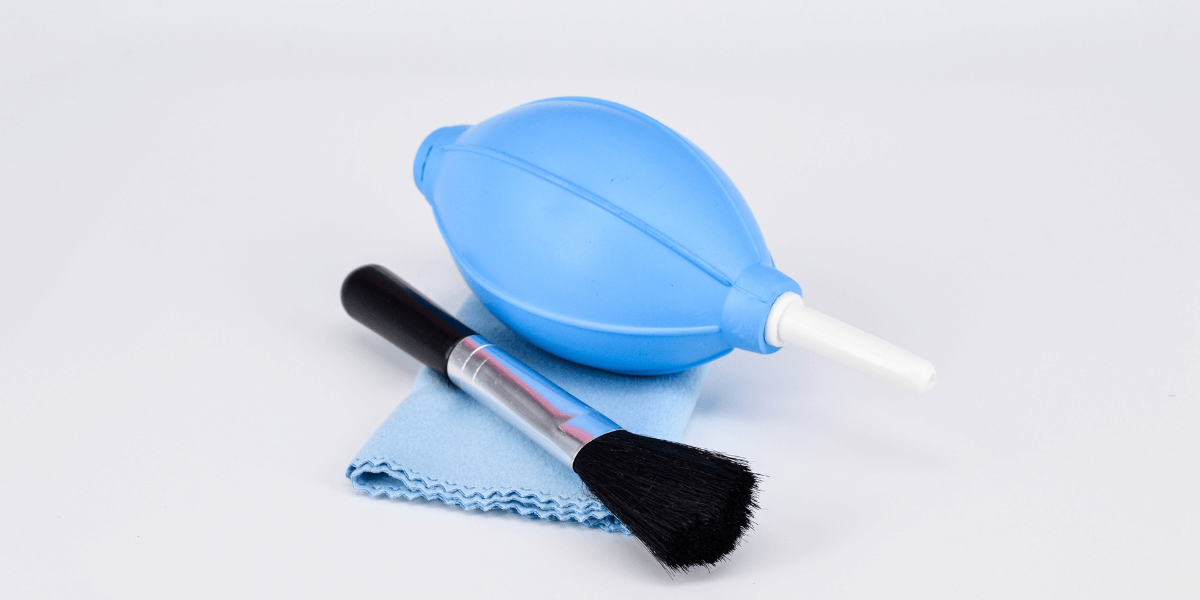
1. Air Blower
An air blower is one of the safest cleaning tools because it removes dust without touching the glass. It should be the first step before using any cloth or liquid cleaner. Avoid using compressed air cans because they may release chemicals or excessive pressure that can damage sensitive camera components.
2. Microfiber Lens Cloth
A high-quality microfiber cloth is designed to lift fingerprints and oil without leaving fibers behind. Regular household cloths, tissues, or clothing materials should be avoided because they may contain rough fibers.
3. Lens Cleaning Brush
A soft brush helps remove particles that remain after using an air blower. The brush should only be used on clean surfaces and stored properly to prevent contamination.
4. Lens Cleaning Liquid
A dedicated optical cleaning liquid helps remove stubborn fingerprints and marks. A few drops are usually enough. The solution should be applied to the microfiber cloth rather than directly flooding the lens surface.
Items You Should Never Use on a Camera Lens
Many damaged lenses result from using the wrong cleaning materials rather than from accidental drops. Some everyday products may feel soft but contain fibers or chemicals that can permanently affect the lens surface.
Avoid using:
- Paper towels
- Facial tissues
- Clothing or shirt sleeves
- Cotton towels
- Glass cleaners
- Window cleaning sprays
- Alcohol not intended for optical equipment
- Baby wipes
- Wet tissues with perfumes or moisturizers
Canon, Nikon, and Sony all recommend using dedicated lens-cleaning products rather than household cleaning solutions because modern lenses feature specialized coatings that require proper care.
How to Choose the Right Cleaning Kit
With many options available, choosing the right lens cleaning kit depends on photography habits, equipment type, and shooting environment.
A beginner who mainly photographs indoors may only need a basic kit with a blower and microfiber cloth. A professional photographer working outdoors may require a more complete solution with additional tools.
Consider these factors before buying:
1. Quality of Cleaning Materials
The quality of the materials matters more than the number of items included. A soft microfiber cloth, clean blower, and safe cleaning liquid are more valuable than a kit filled with unnecessary accessories.
2. Compatibility with Your Equipment
A cleaning kit should be suitable for your camera system. Most lens-cleaning tools work with DSLR and mirrorless lenses, but sensor-cleaning products require specific attention.
3. Portability
Photographers who travel often should consider a compact kit that fits easily inside a camera bag. Studio photographers may prefer a larger kit stored near their workspace.
4. Safety of Cleaning Products
Avoid kits that include unknown liquids or materials that are not designed for optical equipment. Camera lenses contain delicate coatings, and unsuitable products may leave residue or damage the surface.
A Guide to the Best Lens Cleaning Kits
The four kits below cover most budgets and most brands of camera gear, and each takes a slightly different approach to the same basic toolkit described above.
Zeiss Lens Cleaning Kit
ZEISS is known for its expertise in optical technology, and its cleaning products are designed to maintain precision on glass surfaces. This kit is a practical choice for photographers who want a reliable solution for routine lens care.
- Designed for cleaning camera lenses, binoculars, and other optical equipment.
- Includes essential cleaning items such as lens-safe solution, wipes, and microfiber cloths.
- Helps remove fingerprints, oil marks, and everyday dust buildup.
- Compact design makes it suitable for photographers who travel frequently.
- A good choice for users who want a trusted optical brand for equipment maintenance.
- Canon 7-in-1 Professional Cleaning Kit
A Canon-compatible cleaning kit is useful for photographers who regularly shoot outdoors and need dependable tools for routine equipment care. The right cleaning accessories help remove surface dust and marks while protecting sensitive camera components.
- Includes basic cleaning essentials such as an air blower, a microfiber cloth, and a brush.
- Suitable for DSLR and mirrorless camera users.
- Helps maintain lenses by removing dust, fingerprints, and surface residue.
- Sensor-cleaning accessories should only be used when specifically designed for camera sensors.
- Recommended for photographers who need regular maintenance tools for their camera setup.
- Viltrox 5-in-1 Cleaning Kit
Viltrox cleaning kits are designed for photographers seeking a compact, practical solution for everyday lens maintenance. Their portable accessories make them convenient for photographers who need quick cleaning support during shoots.
- Commonly includes tools such as a cleaning pen, a microfiber cloth, and a blower.
- Helps remove fingerprints, dust, and light marks from lenses and filters.
- Its compact size makes it easy to carry in a camera bag.
- Suitable for travel photographers, content creators, and hobbyists.
- Provides essential cleaning tools without adding extra bulk to your gear.
- Nikon 7-in-1 Professional Lens Cleaning Kit
A Nikon-compatible cleaning kit provides photographers with essential tools for maintaining their camera equipment. It is suitable for routine cleaning before and after photography sessions.
- Includes useful accessories such as cleaning cloths, wipes, brushes, or blowers, depending on the kit version.
- Helps keep lenses free from dust, fingerprints, and everyday contaminants.
- Suitable for Nikon users and other compatible camera systems.
- Supports regular camera maintenance without the use of unsuitable household products.
- A practical choice for photographers who prefer keeping multiple cleaning tools together in one kit.
| Kit | Best For | Key Tools Included | Price Tier |
| Zeiss Lens Cleaning Kit | Multi-purpose optics, travel | Blower, brush, fluid, wipes, cloth | Mid-range |
| Canon 7-in-1 Kit | Outdoor shooters, sensor care | Blower, brush, cloth, CCD swabs | Mid-range |
| Viltrox 5-in-1 Kit | Low-maintenance daily use | Cleaning pen, blower, fluid, cloth | Budget |
| Nikon 7-in-1 Kit | All-around flexibility | Blower, wipes, swabs, paper, cloth | Mid-range |
Every great photo starts with clean equipment. Find all these dependable camera lens cleaning kits at Golden Camera. Shop genuine products that help protect delicate lens coatings and keep your photography gear performing at its best.
What Is the Best Lens Cleaning Solution for Cameras?
The best lens cleaning solution is one specifically created for camera lenses and optical glass. These solutions are formulated to remove oil, fingerprints, and marks without affecting lens coatings.
A proper lens cleaning liquid should be:
- Safe for coated optical surfaces
- Free from harsh chemicals
- Quick-drying
- Designed for photography equipment
Photographers should avoid using household glass cleaners, alcohol-based products not designed for lenses, or homemade cleaning mixtures. These products may contain ingredients that affect coatings or leave unwanted residue.
The correct method is also important. Instead of applying a large amount of liquid directly onto the lens, place a small amount on a microfiber cloth and gently clean the surface using circular motions.
The Best Way to Clean Camera Lens Safely: A Step-by-Step Approach
Many photographers focus only on wiping fingerprints away. The real secret is cleaning in the correct order. Skipping steps increases the risk of scratching the lens.
The safest method recommended by camera manufacturers follows this sequence.
Step 1: Inspect the Lens
Check the front and rear elements under bright lighting. Look carefully for fingerprints, sand, pollen, dried water spots, or stubborn dust. Cleaning an already clean lens serves little purpose.
Step 2: Remove Loose Dust
Use a rubber air blower to remove dust before touching the glass. Hold the camera with the lens facing downward so particles fall away naturally. Never blow air with your mouth because moisture droplets can land on the lens.
Step 3: Brush Remaining Dust
Use a soft lens brush only if tiny particles remain around the edges. Brush gently without applying pressure.
Step 4: Apply Cleaning Solution
Place one or two drops of cleaning fluid onto a microfiber cloth. Never apply liquid directly to the lens, as excess fluid can reach internal components.
Step 5: Wipe in Circular Motions
Starting in the center, gently wipe toward the outer edge using slow circular movements. Avoid pressing hard. Allow the microfiber cloth to lift the oils naturally.
Step 6: Inspect Again
Check the lens under light. Repeat only if necessary. Excessive cleaning shortens the life of microfiber cloths and increases unnecessary contact with the lens surface.
How to Clean the Projector Lens Inside
Many people search for the process to clean the projector lens from inside, but this requires more caution than cleaning a camera lens. The external lens surface can usually be cleaned using an air blower and a microfiber cloth. Internal lens elements are different because accessing them often requires partial disassembly of the projector.
Most manufacturers recommend avoiding internal cleaning unless the user is trained to service the equipment. If dust appears inside the lens assembly or projected images show permanent spots that remain after cleaning the outer lens, professional servicing is usually the safest option.
If your projector manual allows basic maintenance, follow these general steps:
- Turn the projector off and unplug it completely.
- Allow the projector to cool before touching the lens.
- Use a rubber air blower to remove loose dust around the outer lens.
- If fingerprints are visible, gently wipe the external lens using a microfiber cloth with a small amount of optical lens cleaner.
- Do not insert cleaning tools inside the projector housing or attempt to separate lens elements unless instructed by the manufacturer.
This helps prevent internal damage and keeps the optical alignment intact.
Common Mistakes to Avoid When Cleaning Camera Lenses
Cleaning a camera lens is a simple task, but small mistakes can lead to permanent damage. Modern camera lenses have advanced optical coatings that improve image quality by reducing reflections and increasing light transmission. While these coatings are durable, they still require careful handling.
Many lens scratches and streaks happen because photographers use the wrong tools or clean the lens too aggressively. Following a few simple precautions helps keep your equipment in excellent condition for years.
1. Cleaning Without Removing Dust First
This is one of the most common mistakes. Dust particles may contain tiny grains of sand or other abrasive materials. Wiping the lens before removing loose dust can drag those particles across the glass, leaving fine scratches.
Always start with an air blower. If a few particles remain, use a soft lens brush before touching the surface with a microfiber cloth.
2. Spraying Cleaning Fluid Directly on the Lens
Applying a cleaning solution directly to the glass may seem harmless, but excess liquid can run to the edges of the lens and seep into areas where moisture is difficult to remove. Instead, place one or two drops of cleaning solution on a clean microfiber cloth and gently wipe the lens.
3. Using Too Much Pressure
Fingerprints and oily marks do not require heavy rubbing. Applying excessive pressure increases friction and may damage the protective coating over time. Gentle circular movements are enough to remove most marks when the correct cleaning solution is used.
4. Using Dirty Microfiber Cloths
A microfiber cloth should be cleaned regularly. If it has collected dust, sand, or dirt during previous use, it may scratch the lens rather than clean it. Store microfiber cloths in a clean pouch and replace them if they become worn or heavily soiled.
5. Breathing on the Lens
Many photographers still breathe on the lens before wiping it. Although this practice is common, moisture from your breath can contain tiny droplets and contaminants that may leave streaks on the glass. A dedicated lens cleaning solution produces much better results.
6. Cleaning More Than Necessary
Some photographers clean their lenses after every photography session, even when the glass looks clean. Frequent cleaning increases unnecessary contact with the lens surface. A careful inspection before each shoot is a better habit. Clean the lens only when fingerprints, smudges, or stubborn dust are visible.
Frequently Asked Questions
1. What tools are safe for cleaning camera lenses?
Safe tools include a manual air blower, a soft camel-hair or synthetic brush, a lint-free microfiber cloth dedicated to optics, and an alcohol-based lens cleaning solution applied to the cloth rather than the glass. Avoid paper towels, tissues, clothing fabric, and household glass cleaners, since these can scratch coatings or leave chemical residue behind.
2. How to remove dust from a lens safely?
Start with a manual air blower held a few inches from the lens, then squeeze several short bursts while angling the lens downward so the dust falls away. If particles remain, follow with light strokes from a soft brush. Avoid compressed air canisters, since their propellant can leave residue, and never wipe a lens before removing loose dust first.
3. Can scratches on a lens be fixed?
Minor coating scratches usually cannot be fully repaired and are often more of a cosmetic issue than an optical one, since most small surface marks have little measurable effect on image quality. Deeper scratches that reach the glass itself cannot be polished out without professional regrinding, which is rarely cost-effective compared with replacing the lens element or the lens entirely.
4. Is it safe to clean a lens at home?
Yes, external lens cleaning is safe at home with the right tools and a careful, patient technique: blower first, then brush, then a cloth with a small amount of solution if needed. Sensor cleaning and any issue involving mold or dust trapped between internal lens elements are better left to a professional service center to avoid accidental damage.
5. What mistakes should I avoid while cleaning lenses?
Avoid wiping before removing loose dust, applying the solution directly to the glass, using tissues or clothing instead of a dedicated microfiber cloth, pressing hard while wiping, and reusing a soiled section of the cloth on a clean part of the lens. Each of these habits is a common cause of fine scratches or streaking that a proper sequence easily prevents.
Wrap Up
A clean lens is one of the easiest ways to improve image quality without upgrading your camera. Removing dust, fingerprints, and smudges helps maintain sharpness, accurate colors, and better contrast in every photograph.
Following the best way to clean camera lens surfaces starts with using the right tools and the correct technique. Investing in a reliable cleaning kit is a small step that helps protect one of the most valuable parts of your photography equipment. Regular care keeps your lenses performing at their best and allows you to capture clear, detailed images every time you press the shutter.
Complete your photography setup with high-quality camera accessories from Golden Camera. Keep your equipment ready for every photo session, travel adventure, or professional assignment with our carefully selected bag cases, tripod supports, and lens cleaning kits.