- Camera
- Camera Lenses
- Camera Gimbals
- Camera Accessories
- Abs Flight Case
- Articulated Magic Arm
- Bag Case
- Batteries Power
- Blackmagic Accessories
- Camera Carry Strap
- Camera Dry Box
- Cleaning Kit
- Cups
- Dji Accessories
- Filters Accessories
- Flash Diffuser
- Gopro Accessories
- Insta360 Accessories
- Laptop Accessories
- Lens Hoods Caps
- Memory Cards
- Micro Photography
- Tripods Support
- Drone Camera
- Video Lights
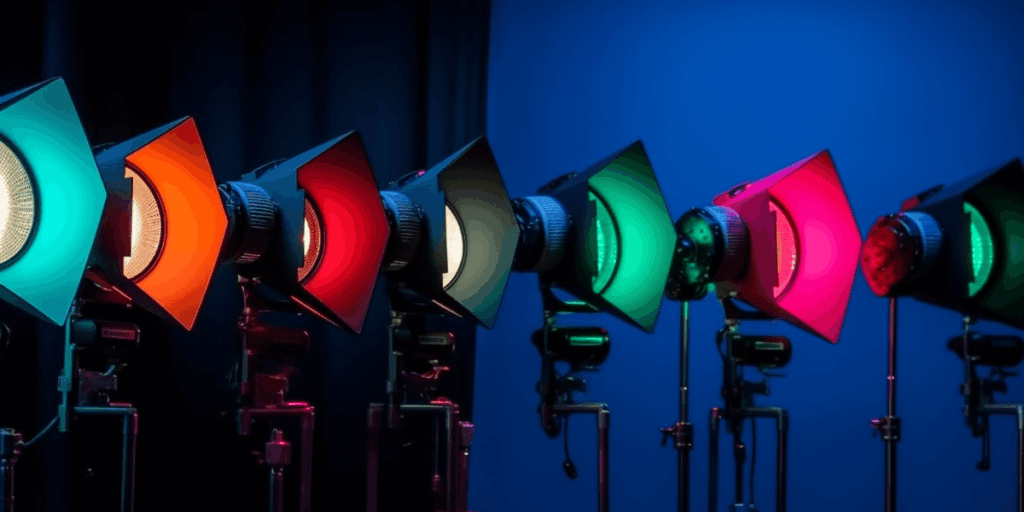
- Lighting & Studio Accessories
- Pro Audio
- Studio Production
- Mobile Gimbal
- Gaming Consoles
- Apple Macbook
- Top Selling
Why Lighting is Crucial for Video Production Quality
Why Lighting is Crucial for Video Production Quality
Lighting plays an important role in video production, and it’s easy to overlook its impact. It influences everything about your project’s quality, from composition to how much detail is visible on your subject. Although mastering scene lighting can be challenging, the payoff is tremendous if you’re aiming to create videos that look fantastic and convey a compelling story.
Effective lighting is vital for crafting high-quality videos and significantly boosting your storytelling capabilities. With the right lighting, you can establish the perfect mood for your production, making scenes and sequences more visually captivating. Plus, it allows certain areas and elements to shine, creating more interest throughout, all thanks to thoughtful lighting choices. Capturing specific scenes or achieving a professional look can be challenging without adequate lighting.
Take a moment to explore this article, and you’ll discover just how important lighting is for enhancing video production quality.
What is Lighting?
Filmmakers and photographers use lighting to beautifully illuminate their projects, including stills and videos. It’s a creative technique that uses light sources to achieve amazing effects. For instance, they create shadows that add depth to storytelling and mood, play with contrasts between light and dark, and explore different color temperatures, among other exciting possibilities.
The right lighting can beautifully brighten specific areas or elements, making them truly captivating. This doesn’t necessarily require expensive gear; you can create fantastic lighting effects simply by leveraging natural light and a sprinkle of creativity.
Lighting is usually managed by either a person or automated fixtures that let you select various brightness levels and think about white balance, color temperature, and intensity. Alongside your lighting fixtures, consider adding lovely external light sources like natural window light or cozy interior lighting.
The Types of Lighting For Video Production
You can explore four types of lighting: natural, artificial, diffused, and reflective.
- Natural lighting is a type of illumination that naturally occurs in our environment, primarily from the sun during the day and the moon at night. This kind of lighting is typically shadow-free, creating a soft and inviting atmosphere ideal for various photography and artistic endeavors.
- Artificial lighting is supplied by human-made sources, such as cameras or computer screens, leading to distinct shadows and highlights in scenes.
- Diffused lighting is achieved when a large surface, like a white wall or ceiling, reflects all the colors in a scene back towards the viewer. This lighting method ensures the light is soft and even, reducing harsh shadows.
- Reflected light does not produce shadows but effectively illuminates the subject, enhancing features and creating pleasing highlights on the subject’s face or hair. This can add depth and beauty to portraits or other visual compositions.
Lighting Tools in Video Production
Lighting is essential in video production, creating atmosphere and enhancing visuals. Let’s explore some key tools that can truly put that awesome effect on your projects as you work with lighting:
- A light diffuser is an essential photography tool that helps spread light evenly and reduce harsh shadows, creating a soft and flattering illumination. It scatters the light from a source, ensuring that the subject is lit more pleasingly.
- A light stand is another vital component, providing stability and support for these lighting tools to be positioned at various angles and heights.
- A light reflector bounces light back onto the subject, filling shadows and adding highlights.
- A gel or diffusion filter can be employed to modify the color temperature of the light or to soften it further.
- A sturdy tripod and camera mount are necessary for maintaining a stable shot, especially during longer exposures.
- Using softboxes, umbrellas, or scrims can dramatically improve your lighting setup, allowing for greater control over the diffusion and intensity of light in your photographs.
The Importance of Lighting in Video Production
Light is to video what ink is to a book; it’s the magic that breathes life into our stories. Mastering lighting can upgrade your video from the ordinary to the extraordinary, if it’s a heartfelt interview or a captivating dramatic scene.
In the world of video production, lighting plays a much deeper role than just providing visibility; it profoundly influences mood, tone, and storytelling. So, let’s dive into this essential element together and explore how to enhance your work.
Types Of Lighting Techniques:
Most videos use a three-point lighting setup, incorporating key, fill, and backlights for production.
Key light
The key light illuminates the subject, defining the shot’s overall lighting with its brightness and color. In interior shots, it’s typically a specific lamp or camera flash, while outdoor daytime filming often relies on sunlight. However, producers cannot position the light precisely, so they must frame the shot to capture the sunlight, sometimes waiting for the right moment.
Fill Light
Fill light illuminates dark areas from a lower side angle relative to the key light, softening shadows and typically being half as bright. While strong shadows can be used in low-key lighting, natural images must be filled with light. Reflectors, such as white cardboard or walls, can help soften the effect of key light.
Backlight
Rim, hair, or shoulder light illuminates the subject from behind, creating a light ring separating it from the background. A kicker adds light to shadows on the subject’s surface, while rim light outlines without affecting the front surface.
Soft vs. Hard Light
The difference between soft and hard light plays an important role in setting the mood of your scene.
Soft Light:
Soft light is characterized by its diffused and widespread nature. It gently wraps around the subject, effectively minimizing shadows. This type of lighting is often associated with overcast days, where the clouds act as a natural diffuser, or with studio setups like a softbox that distributes light evenly.
Hard Light:
Hard light is direct and undiffused. It creates stark contrasts and sharp shadows. It is pretty much the same as sunlight or an intense spotlight.
Getting a feel for when to use each light can truly enhance your video production. If you’re eager to experiment with different lighting effects, you’ll find it easy to pick the perfect light for your needs. Plus, we have some exciting news: we’re offering a fantastic price on LED 5012 in Pakistan at Golden Camera. It’s such an impressive light that will really work wonders for you.
Color Temperature
It is measured in Kelvin (K), which refers to the warmth or coolness of light.
- Warm Light: Light sources below 3500K emit a reddish-orange hue, providing a soft and inviting atmosphere. This type of lighting is perfect for creating cozy, intimate scenes, making it ideal for bedrooms, restaurants, or any space where a warm ambiance is desired.
- Cool Light: Light sources that exceed 5000K produce a bluish tint similar to natural daylight. This type of lighting is especially beneficial for outdoor scenes or when trying to simulate daylight indoors, enhancing visibility and clarity.
Getting the color temperature right ensures skin tones appear natural and the environment feels authentic.
Natural vs. Artificial Light
Each has pros, and understanding when to harness each can transform your shots.
- Natural Light
Sunlight is a powerful tool for photographers during the magical ‘golden hour,’ which occurs shortly after sunrise and before sunset. The light is soft, warm, and beautifully diffused during this time, creating an enchanting atmosphere and flattering high-quality images.
Artificial Light:
- Light sources such as LEDs, tungsten, and fluorescent bulbs provide consistent illumination and allow for complete control over lighting conditions. While they can create various effects and moods, achieving the desired look may require modifiers, such as softboxes or reflectors, to soften shadows and enhance the overall aesthetic of the scene.
Light Modifiers
Using tools like diffusers, reflectors, and gels can help you shape, soften, or even change the color of your light, adding an excellent touch to your photography.
Diffusers
Diffusers are essential tools for softening light in photography. They effectively reduce contrast and shadows, making them invaluable for achieving gentle, soft light in indoor setups. They also create more flattering and even illumination on subjects.
Reflectors
Reflectors play a crucial role in bouncing and redirecting light, particularly useful during outdoor shoots when you need to fill in shadows without relying on an additional light source.
Gels
Gels are transparent colored sheets that can modify the color of your light, which is particularly useful for setting specific moods or correcting the color temperature for various shooting scenarios.
Practical Lights
These delightful light sources, such as lamps, neon signs, or candles, are visible within the scene. They do more than just illuminate; they also enhance your space’s aesthetic value and depth.
How To Set Up Lighting For Video Shoots
Read about how you can set up the lighting for video shoots:
Check around and see what kind of lighting is needed
Examine the area for filming. Count the windows and check for curtains, shades, or light-blocking panels. Think of how this will affect natural light in your videos. Adjust your lighting settings to resolve any issues you find.
Think about brightness and shadows
Uncovered light sources are often too harsh for filming. These hard lights are like table lamps without shades. Instead, use soft lights, which have covers and are great for illuminating dark areas of the walls.
Position the light for filming video appropriately
Creating beautiful lighting is a key focus for many video lighting professionals, and a popular technique they use is three-point lighting. Here’s a friendly breakdown of the three main lights:
- The key light, which shines beautifully in front of and to the right of the camera, should be the brightest of your setup, it’s the show’s star.
- Next is the fill light, placed right in front and to the camera’s left. To ensure it complements rather than competes with the key light, let’s keep its intensity to a maximum of half that of the key light.
- Finally, the backlight sits just behind the camera and to the right, adding a lovely depth to your scene.
Many YouTubers choose this lighting setup because it beautifully brightens the entire scene. It’s truly the best lighting setup for YouTube videos, and you can try it if you’d like.
Adjust the color temperature for the right mood
The video’s mood varies based on the surrounding light tones. Warm lighting has a temperature below 4000K and creates a relaxing atmosphere. For a noon sun effect, opt for cool lighting with a temperature of 4000K or higher, indicating cooler daylight.
Fight glare to avoid distraction
Glare hinders excellent lighting, especially when filming someone in glasses. Move your fill and key lights away from the camera and lift the stands to shine light from above.
If you’re still deciding how to set up your lighting and aren’t sure what to choose for your work or projects, we highly recommend considering a photography softbox. We’re offering the best price on a softbox in Pakistan, so it’s a great time to act quickly and place your order.
Lighting Tips For High-Quality Video
Read about the lighting tips that you can follow for the high-quality final cut of the video that you are shooting:
Pick A Lighting Type
Finding the right lighting for a video involves experimenting with different setups. Some setups are better for illuminating faces, while others create dramatic effects. Keep practicing for good video lighting. You can choose from key, fill, back, and ring lights.
Pick A Lighting Scheme
Studio lighting for video can be set up in various ways, with three-point lighting being a popular method. Alternatives include two-light, four-light, and loop lighting setups, each producing different effects.
Fix glare
To minimize glare from lighting on glasses, raise the lights higher or have someone adjust them while you view through the camera. If that doesn’t work, spread the key and fill lights evenly apart. In a three-point setup, place the key light at 3:15 and the fill light at 8:45. If possible, ask the subject to remove their glasses, but prioritize their comfort, especially if they’re using a teleprompter.
Final Thoughts
Mastering lighting is one of the most powerful ways to elevate your video production. It shapes mood, enhances visuals, and helps tell a compelling story. If you’re working with natural light, artificial setups, or creative modifiers, thoughtful lighting choices make your scenes more dynamic and professional.
Don’t overlook the basics; experiment, adjust, and refine. With the right approach, even simple tools can deliver stunning results. Great lighting isn’t just technical; it’s the art that brings your vision to life.