Canon vs. Nikon vs. Sony vs. Panasonic

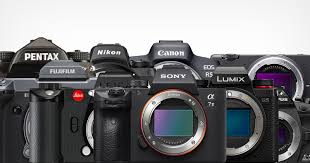
Best Camera Brand – Canon vs. Nikon vs. Sony vs Panasonic

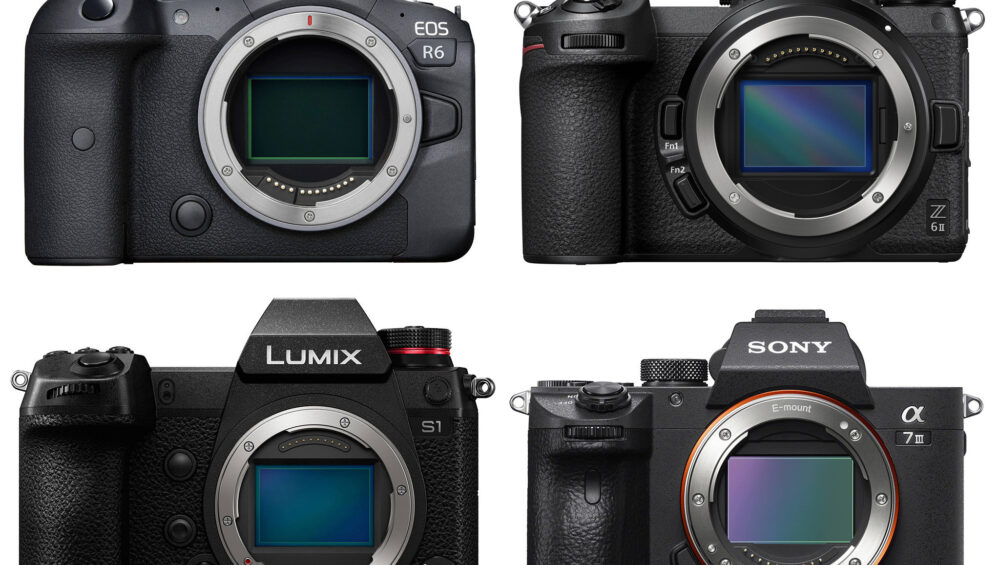
When it comes to full package cameras, four brands that come to everyone mind are– Canon, Nikon, Sony and Panasonic. All four brands create brilliant cameras and optics. So the difficult question remains, how would you choose between Canon vs Nikon vs Sony vs Panasonic?

 All four offer excellent cameras for professionals and entry-level options for beginners. But once you used to one brand, switching becomes tough and expensive. You need to swap lenses and flashes too.

Choosing the right brand from the start is very important. To help you make that choice, we have put together all you need to know about Nikon vs Canon vs Sony vs Panasonic.

Canon

Canon has just about every lens you can imagine, including an incredible series of tilt-shift lenses. Canon also covers the entire price spectrum.

Canon bodies also have great ergonomics. They always felt great in my hands, and I really like the new mirrorless EOS R.

So what’s wrong with Canon? Well, I think they can add new features to their camera bodies for more options.
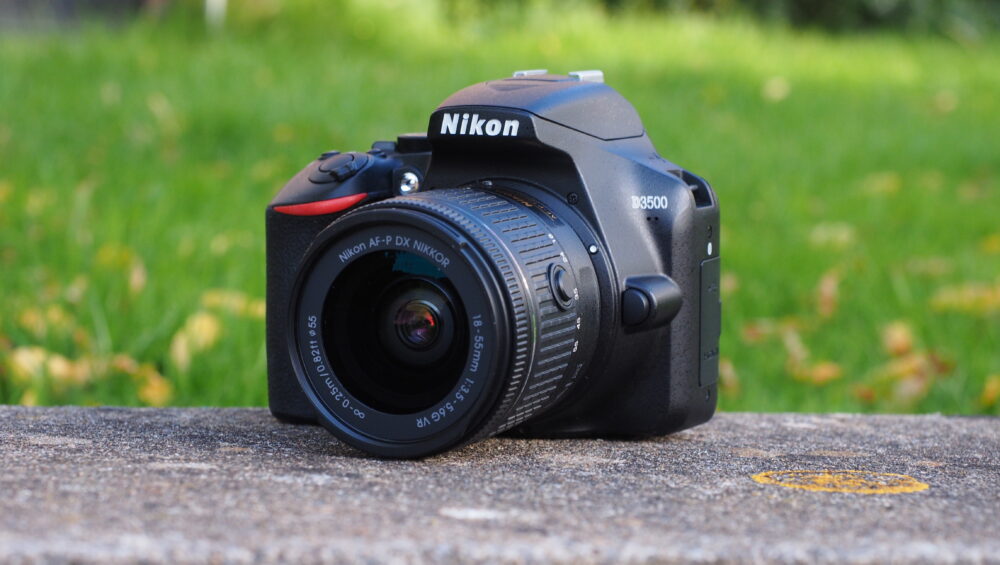
Nikon

There’s nothing horribly wrong with Nikon… but I find it hard to get excited about anything.

The Nikon D850 might be the greatest DSLR ever made, but its new mirrorless Z6 and Z7 cameras just don’t stand out from the pack.

Yes, Nikon makes great lenses, but Canon edges them out in terms of sheer selection and ingenuity.
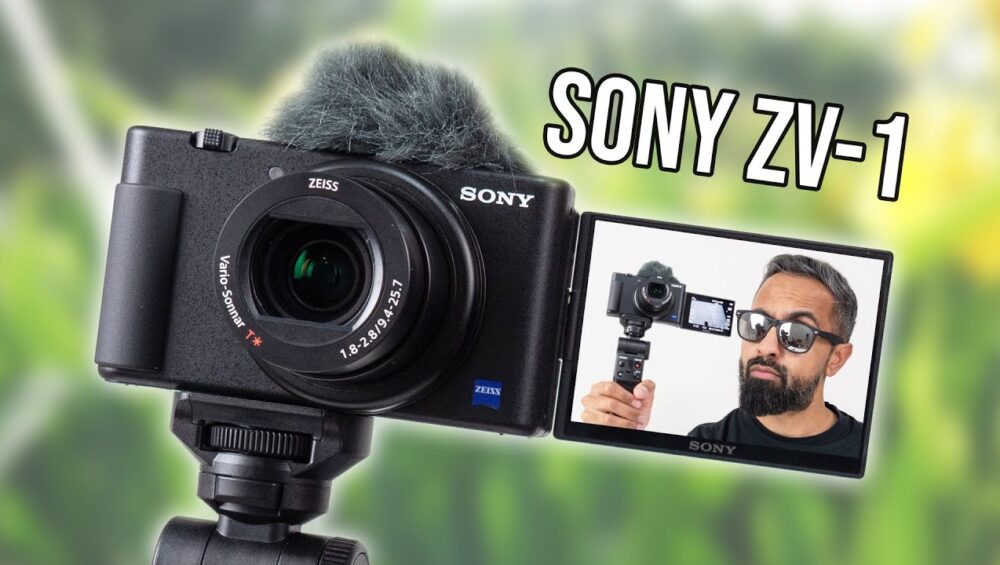
Sony

Sony releases new cameras so fast that resale value isn’t so great (this is good if you buy used), and the lenses are on the expensive side. Sony lenses have a reputation for being overpriced

Still, pound-for-pound, Sony is the mirrorless King right now — at least until Canon and Nikon release more mirrorless lenses.

Panasonic

Panasonic makes excellent video-centric cameras in both the full-frame (S1 series) and micro 4/3 segments (GH series).

The S1/S1R cameras are freaking enormous. Pentax 67 of mirrorless are even bigger than most DSLR’s! And unfortunately, there are only a small number of lenses available, and they are all expensive.

The micro 4/3 cameras like the GH5 and G85 are very nice, but it is hard to get excited about them outside of video.

Best DSLR Brands for Video? Canon vs Nikon vs Sony vs Panasonic Cameras!

When you are choosing a DSLR for video, it can be difficult to know where to start. There are some BIG differences between the major brands like Panasonic, Sony, Canon and Nikon! Choosing the ‘Best Camera Brand’ is not a clean cut decision though… Which is ‘Best’ is highly subjective, and what works for you may not work so well for others…

While all individual DSLR (and mirrorless) camera models are unique, each of the brands has it’s own approach to software, features and functionality that tend to carry across the range – meaning that some brands are better suited for some requirements and workflows than others.

Whether you are in the market to purchase and looking to compare cameras & DSLR brands to find the best DSLR Camera for you, or you’re happy with your current model and just wondering what it’s like on ‘the other side’, then this video is designed to help provide an additional perspective.

Please let us know do you agree that we are in the golden age of cameras? Also, what brand is more attractive to you.

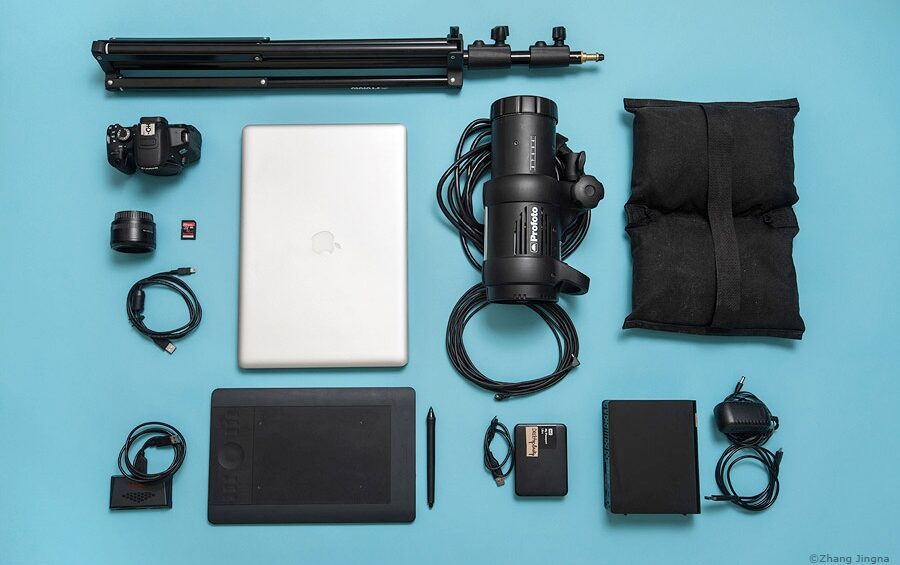
For guidance of camera equipment please contact us.

Photography equipments shops in karachi

Best Photography Equipment List for Beginners

If you are a beginner in photography, there are a few key types of equipment that are considered essential gear and you should have them. Once you have built up the necessary photography skills, then you can invest further in photography equipment. Assuming you already have an effective camera for photography, here’s an essential photography equipment list to get you started on the right foot.

Camera Tripod


Few camera accessories are necessary such as a tripod. Whether you are shooting a portrait, landscape, night, street, or even wedding photography, you are going to need a tripod at some point or another. Tripods are very useful in low-light environments as the stability of a tripod allows you to take longer-exposure shots without any shake of the camera.

Remote Shutter Release


remote shutter release is useful as it lets you “take a shot” without touching the camera body, which eliminates the potential for camera shake and accidental blurring. It is most often used in conjunction with a tripod.

Prime Lens


As you enhance your photography skills, you wll end up purchasing plenty of different  types of lens from Goldencamera.pk that let you take all kinds of shots. But in the beginning, you will be better off starting with a single prime lens. Why you should go for a prime lens? Because the inability of it allows you to zoom and can teach you a lot about proper composition techniques. With a fixed camera lens, you have to think through your shots more, which stretches your skills and helps you improve faster. For Canon and Nikon, the 50mm f/1.8 prime lens is the cheapest lenses, making it a great piece of photography equipment for beginners.

Photography Lighting Equipment


Every photographer needs flash at some shoot, even if you do not intend to shoot in the dark always. It is recommended to not use the built-in flash on your camera body. Instead, spend a little bit on your photography lighting equipment and use an external flash unit.

SD Memory Cards


It is always better to have a handful of smaller SD cards than one big SD card. That way, there occurs any problem or if a card ever gets corrupted, you still have other options to use. There is nothing worse scenario than being unable to shoot because your only card died.

Camera Cleaning Kit


Dust, dirt and moisture can always get into camera bodies, lenses, and other accessories. In the worst case, your expensive camera and lenses may suffer permanent damage. Not paying attention to camera maintenance may be the most expensive mistake you can ever make. That is why you should learn how to properly clean camera gear yourself with a camera cleaning kit.

Camera Strap


As soon as you collected all the other stuff listed, you should go for a quality camera strap. The difference between a good strap and a kit strap is like night and day, and you definitely won’t regret it.

Camera Bag


Once you have all the aforementioned items bought, you will obviously need to carry it all with a properly designed bag for the shoot. Photography equipment is only useful if you have it with you when you want to take pictures! Beginners should consider this large DSLR gadget bag from Goldencamera.pk. For the price, you won’t find another bag that feels as robust and durable. If you intend to also carry a laptop around with you, then you may want to consider the DSLR and laptop backpack instead.

Photography Studio Equipment


If you are looking to get started in setting up a small studio and practice working with lights, backdrops and models then you will need to add a few essential pieces of photography studio equipment to the mentioned list. A fully professional photography studio outfit probably has more lights than you can count on your fingers. If you are just about to start, begin with some entry-level softbox lights or umbrella lights.

Don’t miss out on our great camera equipments and feel free to contact us

Still photography

Tips Of Black and White Still Life Photography

Black and white still life photography is beautiful in its simplicity. Still life photography is all about subjects that are inanimated and cannot move. For example you can capture food, ornaments, flowers etc.Here are top 5 tips to get the best of black and white still life photography.

1. Learn to Think in Black and White

Planning and thinking as a black and white photographer and a still life photo shoot is essential. This process requires a bit of brain storming. Thinking in that way, you will choose the right objects, story and, lighting for your images.

Get inspirations from photographs of the same field and check out their work for the better results. Masters in the field such as Edward Weston and Karl Blossfeldt were pioneers of still photography. They made unique works of art in black and white from simple everyday objects.

2. Enhance Textures and Shapes With Lighting

Without getting colors in the way, you can still play to the great strengths of black and white photography like with shapes and texture.  Look to see where lines intersect and how light accentuates different textures.

Think about this throughout the black and white still life photography process. From selecting your subject matter and photographing it, to post-production and presentation.

It is preferable to use low key lighting with either  sunlight near a window, or a soft sidelight. You can also experiment with and without a reflector. That way, you can check which works best for texture and shape.

Also, move your subject around and see how it catches the light from different angles. Sometimes a subtle move of half a centimetre can make a big difference.

3. Photography

If you are capturing an image without people or movement, it still can tell a story.  You can consider shapes of leaves at different stages of their life cycle. And how different tones can convey emotion into your photography.

Black and white images of flowers gives the true beauty of their lines and shapes. Black and white flower photography is a great starting point for monochromatic still life photography.

Texture and style of a weathered shoe in black and white tell us about their owner, even if you do not feature a human in the photograph.

Antique things give stunning impact in black and white photographs. And you can enhance the story by using sepia or warm monochrome tones.

Look around your home or yard. See what subjects you can find that tell an impactful story. Even the most mundane object can become a work of art. All it needs is the right texture and shape with careful lighting and post-production.

4. Use Simple Compositions to Stand Out

Black and white photography is all about shapes, textures and lines. It is very important to use a clear and simple composition that does not get distracted from these elements.

If you are not certain of your composition, remove something from the frame of your area. Or take a step back to include more negative space.

5. Use the Color Sliders to Enhance Black and White Still Life Photos

When it comes to black and white still life photography, clicking the shutter is only solution of the process. Fine-tuning images in post-production is the important final step.

Clarity adjustment, dodging and burning, and spot removal are standard techniques to tidy up your photo in Lightroom or Camera Raw. But the tool I use most with my black and white still life photographs is the HSL (hue, saturation, luminance) colour slider.

Moving individual sliders up or down gives you great control of light and shadows. It can transform your photograph by defining textures and shapes and even changing the focal point.

Conclusion

Still life photography in black and white provides great opportunities. Just keep it simple; start with objects you are familiar with. Experiment with whatever light and textures and equipment you have on-hand.

Push the boundaries with your black and white still life photography, and don’t be afraid to get a bit arty!

Don’t miss out on our great camera equipments and feel free to contact us

Best Cameras In 2021

The Best Cameras In 2021: DSLR Cameras For Beginners, Enthusiasts, and Professionals

The best cameras have to do all sorts of jobs, from wedding, to high-resolution commercial photography of sports to video . The best cameras are some of the most hardy and reliable thing around – as mirrorless camera technology becomes more common. While mirrorless cameras can be tempting propositions, the best DSLRs can offer incredible shooting experiences, often incorporating mirrorless technology and features, such as on-sensor phase-detection autofocus and m

 Nikon D3500

Nikon D3500 is budget friendly, light, small and easy to use camera– all the qualities that beginners can be appealed also. It seems as if camera system is advancing at great speed right now, but this camera has all the qualities we look into for in a beginner’s camera, and we still haven’t found anything to touch it at this price.

Type: DSLR

Sensor: APS-C

Megapixels: 24.2MP

Lens mount: Nikon F (DX)

Screen: 3in, 921,000 dots

Max burst speed: 5fps

Max video resolution: 1080p (Full HD)

 User level: Beginner

Canon EOS 90D

This is the best Canon camera for enthusiasts that left few professional videographers and photographers taking a look too. It came with groundbreaking specifications that no other camera in this category can match at all.

Type: DSLR

Sensor: APS-C

Megapixels: 32.5MP

Lens mount: Canon EF-S

Screen: 3in vari-angle touchscreen, 1,040,000 dots

 Viewfinder: Pentaprism

Max burst speed: 10fps

Max video resolution: 4K UHD

User level: Enthusiast

Nikon D7500

Nikon followers looking for an all-round equivalent to the all purpose Canon EOS 90D should also take a look at the Nikon D7500. It offers a slightly faster 8fps continuous shooting speed, and a proven 51-point autofocus system with the ability to capture 4K video at once. This camera has a lower resolution (20MP vs 32.5MP) but in real-scenes shooting its high performance sensor delivers potos which are not far behind the results by the Canon, despite the difference in megapixels.

Type: DSLR

Sensor: APS-C

Megapixels: 20.9MP

Lens mount: Nikon DX

Screen: 3.2in tilting touchscreen, 922,000 dots

Viewfinder: Pentaprism

Max burst speed: 8fps

 Max video resolution: 4K

User level: Enthusiast

Nikon D780

Nikon D780 takes detection autofocus in the on-sensor phase of Nikon’s own mirrorless Z6 to offer a DSLR with mirrorless camera live view in fantastic performance! This camera is like a supercharged, modernised version of Nikon’s popular D750 model. Nikon D780 doesn’t just have advanced live view but it also comes with a high resolution tilting touchscreen, dual UHS-II compatible memory card slots , 4K UHD video, and continuous shooting speeds about 12fps in live view mode.

Type: DSLR

 Sensor: Full frame

Megapixels: 24.4MP

Lens mount: Nikon FX

Screen: 3.2in tilting screen, 2,359k dots

Viewfinder: Pentaprism

Max burst speed: 7/12fps

Max video resolution: 4K UHD

User level: Enthusiast/professional

Canon EOS 6D Mark II

We adore Nikon D780, but Canon EOS 6D Mark II has been in the market longer and has much impressive feature. The 26-megapixel sensor is more than enough, it also does have Canon’s Dual Pixel CMOS AF system, so the autofocus in live view is very speedy and effective.

Type: DSLR

Sensor: Full frame

Megapixels: 26.2MP

 Lens mount: Canon EF

Screen: 3.2in vari-angle touchscreen, 1,040,000 dots

Viewfinder: Pentaprism

 Max burst speed: 6.5fps

Max video resolution: 1080p (Full HD)

User level: Enthusiast

 Nikon D850

Nikon D850 is a costly camera but its features put it in a class of its own. It has 45.7MP resolution, and 153-point autofocus system. It can capture pictures at 7 frames per second – or 9fps with an optional MB-D18 battery power.

Type: DSLR

Sensor: Full frame

Megapixels: 45.7MP

 Lens mount: Nikon FX

Screen: 3.2in tilting touchscreen, 2,359,000 dots

Viewfinder: Pentaprism

 Max burst speed: 7fps

Max video resolution: 4K

User level: Enthusiast/professional

WRAP UP

Choosing the best professional camera is not just about picking the one with the most enticing specifications but you have to look at the camera as a whole, its model, its lenses, and what is set to be released in its future. Before choosing a system, it is worth asking yourself a lsit of questions: 

1) Are you switching from a different systems? If you are switching from a different system, it is worth looking well into whether there is any potential compatibility between your existing and new system. Existing system migration is much simpler and cheaper than starting with a whole new setup again.

2) What lenses will you need? Think about the typeof work you need and the lenses you reuqire for the purpose and check whether the system you are choosing can meet those requirements.

3) DSLR or mirrorless? It does sometimes feel like mirrorless is getting around the world, but the best DSLR cameras do still have their advantages, like the Canon EOS-1D X Mark III, are making new ground.

Shop with us to experience more or contact us.

intentional camera movement

Take Creative Landscape Shots Using Intentional Camera Movement

If you are looking to take some creative and unique pictures, then trying out intentional camera movement photography is highly recommended.

Now, many photographers rely on ensuring your camera is not moving during exposure for sharp images. But the question is, is keeping your camera still always a good idea?

Instead, why cannot we throw caution to the wind, camera can be moved while the shutter is open, and explore variety of creative opportunities this brings to you as a photographer?

In this blog, we will tell you how to do that exactly!

What is intentional camera movement and why should you consider it?

Intentional camera movement or ICM is a technique of taking picture from the camera where you move it as the photo is taken.

To be specific, intentional camera movement can be used to capture creative and unique landscape shots. This technique can be liberating exceptionally, and by minimizing the number of errors occur in a landscape, it allows you to concentrate on form, line, and color in your images.

With Intentional camera movement, a scene that you may consider just ordinary too cluttered now will come to life It is done by letting you blend shapes and colors for an interesting abstract shot.

If you are up to make your next photographic project stunning and inspiring then you want to get your creative juices flowing and intentional camera movement is a technique that you should try at least once.

In fact, it is relatively easier to take some stunning shots with ICM technique.

The Best Settings For Intentional Camera Movement Photography

A key factor to get right portraits when using ICM is your shutter speed. Exposure needs to be long enough to capture significant amount of motion blur (With different shutter speeds you will get different effects).

In general, from 1/3s or 1/2s all the way down to multi-second exposures is recommended. But of course, you are always free to experiment yourself with shutter speeds whether faster or slower; the core of a creative technique like ICM is simply playing around.

Because of long shutter speeds, shooting in low-light conditions is ideal for this technique. During the daytime, it can be harder to achieve the required shutter speeds, even at your camera’s lowest ISO setting and your lens’s smallest aperture (i.e., highest f-stop number).

Moving your camera

Once shutter speed is in your control, the next step is to determine the movement of camera after pressing the shutter button.

Go creative; there are no rules for this! You can move the camera horizontally, vertically, or diagonally. You can move it fast or slow. Alternatively, you can move the camera 360 degrees to create a spiral effect, or it can be changed to the focal length on a zoom lens during exposure to create a zoom effect.

You can combine even two or more of these movements to create something creative, this can be done with practice. The look and feel of your final products will be determined by the direction, speed, and smoothness of your chosen movements.

Most importantly tripod option is always there to control the camera movement. This essential  will help you to capture a smoother pictures, which can be useful if you wish to retain a straight horizon line.

What to shoot for the best results

Now till this step you know how to capture beautiful photos with ICM technique, all that is left is to pick ICM subjects now.

A good place to begin this is by finding locations that offer striking colors, patterns, and lines

For example, Forests are a favorite ICM subject – Clean, parallel lines by the trees, as well as the amazing bright colors of nature (gives by flowers in the spring and fallen leaves in autumn), lend themselves to a vertical camera movement shot. The movement can be from the bottom up or from the top down, and it can be fast or slow; it really just depends on the effect you wish to create and how experimental you want to be.

A few intentional camera movement tips

Intentional camera movement is a highly subjective art technique, and what works for you will not work for others.

Also, keep in mind basic principles of photography, such as  composition and exposure – these are still very important!

Also, while the ICM technique will give you a very abstract result, you may find it helpful to have at least one element of the scene sharp or recognizable in the final image

Finally, there is an element of trial and error when starting out with intentional camera movement. You’ll quickly find out what works for you and what doesn’t; this will help you develop your own style.

Get more guidance on this topic or shop with us. For more information email us at [email protected] or call: +923122951169.

Nikon D3500

Nikon D3500 For Travel Photography? Great Choice or Not?

It is amazing to discover how good is this beginners camera along the journey of self-teaching. Comes with Adobe Lightroom and produces many photos that will make you proud.

One doesn’t need to be a photographer to know a great photo when you see one. And you necessarily don’t need to be a professional photographer to take a great picture, you just need the Nikon D3500. It is as easy to use as a point-and-shoot, but it takes amazing DSLR photos and videos that stand unique. It feels balanced in your hands, sturdy and outstanding with controls where you need them. It’s compact, versatile, durable and, ideal for travel. And it works flawlessly with compatible smart phones, making it easier to share your great photos. Even if you have never used a DSLR camera, you still can take beautiful pictures with Nikon D3500.

Things You Should Know About Nikon D3500

Let’s talk about its amazing features now.

It’s a DX-format DSLR

Due to the compromising field of view, DX-format cameras are comparatively cheaper, compatible and lighter. Same goes for their lens, which is also cheaper and lighter than FX-format lenses.

That explains why beginner DSLR cameras has mostly DX-format. They are cheaper than FX-format DSLR cameras and it is better to test the water before keeping your whole foot into the pool of photography.

The Kit Lens

kit lens is a lens that comes along with the camera at the time of purchase. For Nikon D3500 18mm has wider angle compared to 55mm. That means you can zoom in from 18mm to 55mm. Keeping in view that the camera still delivers great photo quality no matter how much we zoom in with your lens (not digitally), unlike, most smart phones in the market.

VR stands for Vibration Reduction

VR is also known as Image Stabilization for Canon though, both are same. As the name suggests, it minimizes the vibrations caused while taking the photo like your shaky hands.

Videos at the touch of a button

Recording beautiful video with the Nikon D3500 is as easy as taking photos. Just change the Live View lever and press the recording button. You will be capturing awesome 1080/60p Full HD video effortlessly and instantly. Use your lens’ zoom capability to shoot wide angle videos or tight close-ups.

Superb NIKKOR lenses; the eyes of the D3500

Every Nikon DSLR lens offers new perspectives. Discover inspiring world with an extreme close-up macro lens. Give your backgrounds a charming out of focus effect with a fast prime lens. Zoom lens  will capture the whole scene with an ultra-wide-angle.

The day tripper

Small enough to be discrete, durable enough to withstand rough conditions; the camera is also available with two outstanding travel lenses, you will never want to leave home without your Nikon D3500.

WHY YOU SHOULD GO FOR NIKON D3500?


Great For Portraits

 If you take a lot of portraits during your travel, I would say a Nikon D3500 is your thing to carry. Switching to a better lens with a wider aperture would be a great option.

Sharp Images with Kit Lens

Images captured using kit lens are usually better than expectations. Nikon did a great job when it comes to this.

The Cheap Price Tag

Nikon D3500 is the perfect entry-level DSLR for all the beginners. Comparing the similar entry-level DSLR cameras between Nikon and Canon, the price sounds more appealing for Nikon D3500 (check our website).

Quick Auto Focus for Kit Lens

Nikon did an amazing job for the kit lens. The speed of the autofocus is quick, smooth and accurate. Unlike the F1.8 Nikon lens that I bought, which took a little longer to focus and a little noisier.

Long Battery Life

Nikon D3300 is capable of capturing 700 shots spanning multiple hours. I once went camping without my charger for 3 days. By the time I got home, I had 2/3 battery life left despite taking hundreds of photos. Impressive, huh? And something more impressive, Nikon D3500 captures 1550 shots in one-go!

Small and Light

Travel is all about packing like a minimalist for some. In that case, Nikon D3500 did a great job because it’s probably one of the smallest DSLR cameras out there.


Time-lapse photography

Essential Techniques for Time-Lapse Photography

This article will cover a handful of necessary items for time-lapse photography, if you are getting started, use this as a checklist of essentials you will need.
Time-lapse can be a tricky thing and often issues will arise in the final product that did not appear in any individual picture like flicker, highlight clipping and camera shake. Proper preparation of this can solve most of these issues and being well equipped is a good idea to start. Here are some ideas for equipment that will help you complete the envisioned time-lapse.

Tripod: First and foremost thing that is very essential is a tripod or some other type of stable mounting equipment such as a fixed enclosure for longer-term time-lapse or hi-hat for lower angles, or a f.

Intervalometer: Secondly, you will need an intervalometer or controller. . It is nearly essential. The intervalometer will allow you to set the intervals between each capture, which is the need to shoot your time-lapse.

Batteries: Third would be enoughpower. especially if you are shooting for a longer period of time. This is the last thing you need for the power to run out in the middle of your time-lapse shoot. 

Neutral density filters: This equipment will reduce the amount of light that will touch your sensor without altering color. This will set to use larger apertures and greater exposures in circumstances which otherwise might end up in some highlight clipping.

Different ways of shooting time-lapses

Time-lapses can be shot in different ways, each method has their own pros and cons. Three primary methods for shooting time-lapse videos are:

  • Mobile phone: Smart phones have a time-lapse feature that makes it easy to capture uninterrupted time-lapses while on the go.
  • Video: Shooting a video for a long time and then adjusting  its speed in post can be used to create a time-lapse effect.
  • Series of photos: DSLR camera to shoot high quality images at a regular interval and then creating a motion video at a certain frame rate is a good option also.

By far, the best way to create a great time-lapse with quality, desired frame rate, resolution, and dynamic range is concerned is using a DSLR camera. You cannot control each one of these variables on a mobile phone or video camera.

Software and Applications for assembling time-lapses

There are various software programs available in the market that you can use to convert your series of pictures into time-lapse video. Some software are free and some are premium or paid.

  • LRtime-lapse plugin : This is the great time-lapse software available and it is very powerful and logical. It lets you make 12 to 15 seconds time-lapses (400 images) with the free version. You need to use it with Adobe Lightroom.
  • Adobe Premiere: It can allow you to select your series of images and it will convert them into a time-lapse clip which you can export also.
  • FFMPEG: It is a command line tool that convert your series of images into a motion video. Not everyone is familiar with using the command line tool, but it is open source, and many options are available.
  • Time-lapse Tool: A powerful time-lapse tool with various options.
  • SkyStudio PRO: It is a small program that is comparatively easier and users friendly.

Quick Tips About Time-Lapse

  1. Do not focus on too many different types of movement while time-lapse. The shutter speed will be suitable for one image, but may not give the same results for another.
  2. Shoot all images/videos in manual all the time and only go for semi-automatic if light and exposure change dramatically. Manual settings will give more consistent results.
  3. Do not use foreground subjects that are moving fast like trees, etc. When you will increase the speed of your time-lapse, those subjects will move too steady and will result in distraction.
  4. If you are shooting for the first time a certain subject and you are not really sure which interval to use, it is best to use one that is faster than you need than slower ones. You can then speed up so many frames in one post
  5. If the exposure is not changing dramatically, you can have an option to shoot in JPG to save space and time. It also allows you to shoot many frames and shoot longer, giving you an even more creative side when selecting the speed of your final shoot.
  6. Capturing something that moves slowly will make the time-lapse look unique.
  7. Adjust your composition a bit wider so that you can introduce zooming to create variety in your clips. Also, it will allow you to stabilize shots digitally in your post.
Sony ZV-1 in Karachi

Sony ZV-1 – Camera for Content Creator & Vlogger of Pakistan

Are you passionate about photography and videography and want to make people amaze with your these extraordinary skills? Then you the brilliant Sony ZV-1 Digital Camera is a must thing for you as it has features that will surely add to your skills.

Sony has added a  latest category to its compact camera line-up, it is a compact camera, similar to the RX100 series, but with a tweaked design. The LCD rear display can be turned 180 degrees from the side and flipped outwards, there is a face priority autofocus option also and audio quality is great, thanks to a three-capsule microphone.

SONY ZV-1 SPECIFICATIONS

Sony ZV-1 features 1 inch sensor , 20.1-megapixel, and a 2.7x optical zoom support. The aperture ranges from f/1.8 to f/2.8. Its 3 inch touch screen display at the back can be moved all the way from the side, forwards, thus giving the user better flexibility when shooting. It has the ability to track eyes and faces so you’re always in focus when shooting yourself. The ISO range is from 125 to 12,800.

Sony ZV-1 has a special button for adjusting the background when shooting for content and vlogs. There is also a new ‘product showcase’ setting that automatically shift focus from your face to the object being shown off to the camera. This is easy and should be very handy for review videos, where you want to show the product off to the camera. The three-capsule mic in the front also promises clearer audio, and the camera ships with a wind screen for it, to block out wind noise. There is also a 3.5mm socket and a hot shoe for external microphones. ZV-1 supports stabilization so you can get faster footage when shooting handheld. The Sony ZV-1 measures 105.5 x 60.0 x 43.5mm in dimensions and weighs just 294g.

CONTENT CREATION AND VLOGGING SPECIFICATIONS

The special rear 3” rear and LCD touch-screen are perfect for selfie portraits and shooting films. The light-weight and compact camera design enables good grip and convenient use. During the recording the impressive front lamp can best work as a visual indicator.

With this specifications we can assume that, Sony ZV-1 Digital Camera is ideal for content creation and vlogging tasks and assure smooth transition. Apart from this, the ND filter uses the transition mode in bright light areas through regulating overexposure.

And the exclusivly designed face-priority AE targets the subject’s face and fine-tunes the exposure to make sure that the picture is captured in perfect brightness. And the AE technology alerts any sudden changes if the subject face slowly disappears from the frame to disregard any dark shots or blown-out. When you use Sony ZV-1 Digital Camera helps enhance skin tones and you can also enjoy refined color science.

The integrated DRAM chip, the 20.1MP 1″ Exmor RS CMOS sensor delivers extraordinary image quality that complies with ISO 100-12800 standards. The pixel areas sensor amasses, fast-speed signal processing course and deliver some extraordinary features that includes as Single Burst Shooting, an Anti-Distortion shutter, UHD 4K video etc.

The sensor is complemented with BIONZ X image processor and front-end LSI to intensely enhance the speed and output of the imaging system supporting blackout-free unremitting shooting at up to 24 fps with incessant AF/AE controls being performed at 60 times/ second.

The front-end LSI and optimized sensor performance also enhance overall image excellence particularly at highly sensitive points. The camera’s special integrated ZEISS lens functions efficiently in a wide range of conditions. The lens helps professional camera functioning in low-light conditions is best for isolating subject matter techniques.

And the premium optical camera design integrates a series of specific elements that diminish deviations and misrepresentations and ensure high sharpness and perfect interpretations. The special ZEISS T* anti-reflective coating has also been applied to overpower any reflections and glare and ensure optimized contrast and color fidelity.

Sony ZV-1 Digital Camera also feature speedy hybrid AF System with 315 Phase-Detection Points, Wireless Connectivity, interval shooting mode and picture-perfect modes. With the affordable Sony ZV 1 price in Pakistan and best features, ZV 1 seems the best camera in this category.

For more guidance on this topic or camera gear please contact us at: [email protected] or call: +923122951169.

photography places

Exploring the Best Photography Places in Karachi

Karachi is a metropolitan city with more than 200 million people from different cultures and ethnic backgrounds as its residents. It is also known as the city of lights because most of the commercial and business activities and, especially restaurants serving the best desi food in Karachi, remain functional until almost full night. Apart from that, being the hub of economic prospects, Karachi is also a center for some of the most versatile photoshoot places.

During the British era, the ruling authorities have constructed some of the most memorable monuments and structures that remain intact to this date, except the city’s famous Mausoleum, where the founder of Pakistan, Mohammad Ali Jinnah, was laid to rest when he died.

Some of the historical places are most famous among the nationals of the country as well as foreign visitors. They especially prefer having detailed photography at some of the most famous structures. Let’s help you to explore the most famous monumental structures that can potentially make  the best photo shoot places in Karachi.

FRERE HALL

Frere Hall was constructed during in 1865 but till date it remains one of the most iconic structures in Pakistan. This historical building makes it a beautiful sight for high-value photographs shoots like weddings and for any other special occasions.

The best thing about this building is that it is easily accessible to everyone to use it as one of the best photo shoot destinies in Karachi. For the past few years, it has also been arranging the famous Karachi Food Festival, which takes place every year.

MOHATTA PALACE

It is a vast mansion, and was built in the 1920s by the Mohatta family. It is one of the best attractions of Karachi for its beautiful gardens that surround the main palace. The beauty of this structure is that it is constructed using Gizri stone and  pink stone from Jodhpur.

Mohatta Palace is the building of Mughal Architecture. It is a beautiful place to visit, and people visiting from the other cities within Pakistan as well as for foreigners. Mohatta Palace is ideal for photo shoots and witness its historical importance.

It is also often used by production houses in Pakistan for photo and video shoots consisting of top models of showbiz. Some notable political families have also preferred Mohatta Palace as the perfect sight to host lavishing events.

QUAID’S HOUSE – FLAG STAFF HOUSE

Mohammad Ali Jinnah, Founder of Pakistan bought this house in 1944 and used it as his residence for a few years. It was built in 1890, and it is popularly known for its architectural design. The antique looking design of this building makes it a perfect place for photo shoots and video making. What makes it even more appealing is its cost-free accessibility.

People also prefer visiting it with their kids so that they also hold its importance as a unique historical monument and increasing knowledge.

MAZAR-E-QUAID

It was built post-independence, and what is so unique about this structure is that, that it was entirely constructed from white marble. It is an architectural gem which makes it a perfect venue for photography. It has also cost-free accessibility.

The top political authorities and people visits this place to pay respect to one of the most prominent leaders and founders Pakistan. During such events or visits, there is massive media coverage as well as photo shoots aiming to highlight the historical importance of the monument.

AHANGIR KOTHARI PARADE

This historical site is located in the Porsche area of  Karachi – Clifton, and it also links to Bin Qasim Park. The architecture of this monumental structure has two divisions: The Lady Lloyd Pier and The Promenade Pavilion. These structures were established in 1920 using famous pink stones from Jodhpur. It is also free for everyone, and also makes a perfect site for photo shoots. It has lush green Bin Qasim Park in neighbor that provides the most stunning views for ideal photography.

Bin Qasim Park is the biggest park in Karachi, and frequently visited by families as it provides a perfect sight for stunning photo shoots. It is highly crowded, especially during the weekends as people enjoy some of the best moments of their life. For more guidance on this topic or camera gear please contact us at: [email protected] or call: +923122951169.

Natural Light photography

Tips For Taking Stunning Portraits In Natural Light

Many photographers do not recommend taking pictures in daylight because of harsh light and it is also difficult to work in. Models also struggle to hold poses or do expressions while shooting if it’s too hot or too bright. However, with some adjustments, tips, and workarounds, it is actually possible to get great results in this kind of lighting.

In this article, we shared the best tips for anyone thinking of taking portraits in natural sunlight. These tips will address some of the common issues that photographers face while shooting, such as casting shadows over the subject, overexposure, and help to make the photography easier for models and people around.

Choose right time

Early mornings or sunset, as the light is objectively not sharp to work with and can make images better. But, just because the sun is on high exposure in the middle of the day, and it seems too harsh, does not mean you need to stay inside entirely. Find some shady side of a building, and you will good to go with the lighting that is undeniably acceptable. Also, sometimes the results will amaze you.

Sun Seeker App

Sun Seeker app simplifies scheduling and planning an outdoor shoot. It simply places a grid over your screen that is essentially augmented reality and then it tracks the solar position and path. So, as a photographer, you can depict exactly when and where the sun will be for the next hours. If you are entirely shooting outside, this will be a lifesaver. You can find your location, use this app, and determine if it will be a good spot or not based on where the light will be by the time you are taking photos. Once you will be clear with where you want your shoot to be, this app will be your thing to carry around.

 Shower Curtain Diffusion

Using Curtain diffusion is one of the oldest tricks used in photography and, is a good way to create an even, soft light on your subject that gives a very cinematic feel. So how to do this without any studio lighting? Windows – Positioning your subject near to a window can be a fantastic solution when staying inside, while also creating an even light spill. However, softer lights can be needed, just grab some shower liner and tape it or hang it from a C-stand over the window. It is very cheap and won’t make you buy any lights.

Attention to the Shadows

So back to the first point, shooting outside the studio or using natural light will always produce surprising results. The lighting will never be what you expect. Whether it is overlooking trees, clouds, buildings, there are many objects that can change the lighting that you will need to workaround. Another one of the mentioned aspects is shadows.

Shadows can be an amazing asset to your shoot by adding interesting meaning and shapes. Working with shadows can sometimes be tricky; you just have to pay attention to what is going to happen with the sunlight and how the subject will react to that light.

Cinematographers Help

Finding photographic inspiration can be hard. The solution to this problem is to get on Instagram, and you see an award-worthy photo in the scrolling of your first 15 seconds. But, often, this admiration is fleeting, that is why finding good cinematographers who inspire you is a great solution.

Here we are saying cinematographers and not photographers because the change in medium is a good way to mix up the creative work. Checking how cinematographers handle natural light on digital photography is a good lesson for photographers.

Try Shooting Film

It feels like a broken record at this point, but shooting on film will change your perspective on lighting, editing, color, shadows, and the entire process. The reason we bring it up now is that when you shoot with a low-ISO film like 100 or 400, shooting in the middle of the day will change the way we see natural-light photography. The increase in dynamic color and range differences is frankly shocking at times.

For more guidance on this product please contact us at [email protected] or call +923122951169.