Basic Equipment for New Filmmaking Students

Basic Equipment for New Filmmaking

First of all congratulations on starting film school! You are probably already trying to figure out what equipment you will need to get started. Fortunately, most programs have many important tools available for students—namely big stuff such as camcorders and lights. Still, there are accessories, expendables, and other pieces of gear that you’ll want to have on hand or own yourself. So what exactly do you need to be prepared for film school? Luckily, not all that much.

What camera do I need?

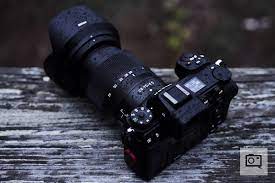
To get started, you can likely get away with a camcorder, mirrorless camera, or DSLR with high-quality Full HD video capabilities. It is quite easy to get an inexpensive model with 4K video these days, so that is definitely worth looking into. If you are just starting your program and you are lucky enough to have access to great, modern cameras, then you should be okay getting something relatively cheap for your personal kit.

Lenses

If you’re buying an interchangeable lens camera, you can buy it with a kit zoom lens, or buy the body alone and choose lenses separately. For an APS-C camera with the kit lens, I recommend adding an affordable 50mm lens for low light shots and creative shallow focus.

Sound Equipment

Sound is as important as pictures, and you won’t get great audio with the microphone in your camera. Using a separate microphone will make a big difference. Lavalier (‘lav’) microphones, which clip onto clothes, are the most affordable way to get good sound.  Wireless lavs are great if you can afford them. You can also use a directional microphone on a boom pole.

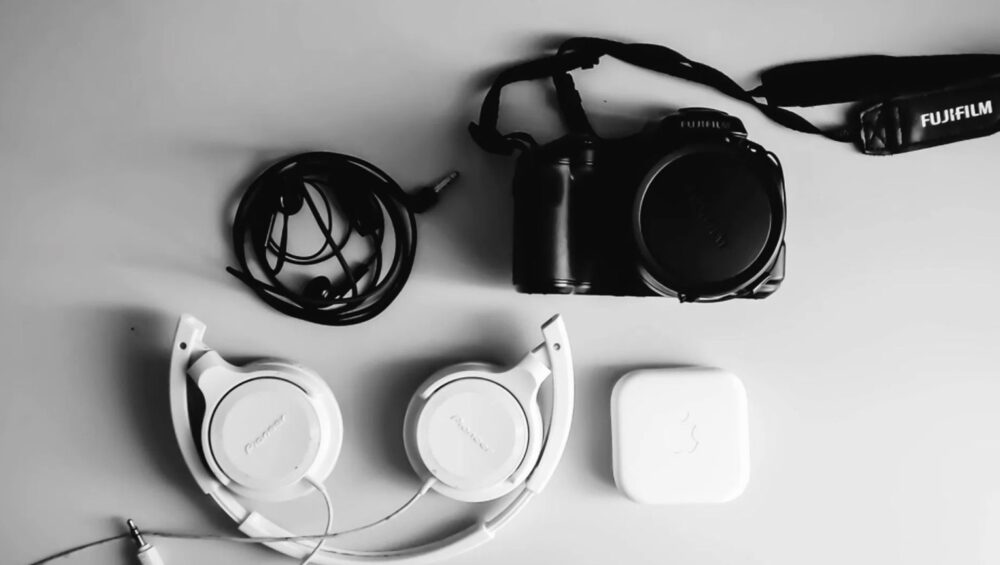
You really need to be listening to the sound on headphones as you shoot. But some cameras have limited audio recording options – and no headphone sockets – so you may need a separate audio recorder.

Tripods and Camera Support

It’s important to keep your camera steady. Some cameras have very effective built-in stabilization, but most filmmakers use a tripod or monopod at least some of the time. If you want to be able to pan and tilt your camera smoothly, you’ll need a fluid head tripod. You can also get sliders (for smooth tracking shots), electronic gimbal stabilisers (for continuous flowing shots), and jibs (for vertical camera movements).

Lights and Reflectors

Once you start to get serious about filmmaking, you’ll want to control the lighting. You can use inexpensive five in one reflectors to enhance natural light. Basic work lamps are a good starting point for learning about creative lighting. For filming on the go, LED panels are the most convenient option, though good ones are expensive. For a budget studio setup, CFL soft box lights could be a good choice.

Editing

You can edit on Macs, PCs, phones or tablets.

Computers

I use Macs. They’re designed for video editing and widely used in the film and media industry.

You’ll get more for your money with a PC, but they aren’t as user-friendly and you’ll need to check that the spec is good enough to run your editing software. Video editing – especially 4K – takes up a lot of space and needs a powerful computer.

If you don’t need to be portable, a desktop computer will be better value for money than a laptop.

Storage

If you’re just doing small projects, you can keep all your video on your main system drive, but for large and more ambitious projects you’ll probably need external drives. Solid state drives (SSDs) are faster but more expensive than hard drives.

As always, you can ask any questions in the Comments section, below, and we will be more than happy to help you as you prepare for film school.

Photography equiments for bloggers

The Best Photography Equipment for Bloggers

Instagram, Pinterest, Facebook, etc. all of these social media platforms encourage visually creative and attractive images. To tie your brand and blog to the images you post online, you may decide to create these pictures and photos yourself. When it comes to blogging though, there are a few pieces of photography equipment that can really help in taking your photos to the next level. In this post, we are going to look at the best photography equipment for bloggers and how they make your pictures stand out from the crowd.

Best Cameras for Bloggers

The first thing you need in order to take a photo is a camera ofcourse. As I have already mentioned, this does not need to be the latest & greatest DSLR or mirrorless camera on the market. You could use your smartphone, a compact camera or a more affordable interchangeable lens camera.

If you’re looking to create some professional looking images at an affordable price, have a look at my guide to the Best cameras of 2021.

Most of these cameras feature an interchangeable lens, making them extremely versatile and for blogging that can be a massive advantage.

Best Camera Lens for Bloggers

If you decide on a mirrorless or DSLR camera, you are going to need a lens or two. Which lenses you go for all depend on what type of camera system you are using and what exactly you photograph for your blog.

This is a 50mm lens (or equivalent to 50mm if you’re using a camera with a crop factor) that has a wide aperture, and generally doesn’t cost an arm and a leg. The bonus of a wide aperture, like f/1.8, is that you can get some great bokeh quite easily.

Best Tripod for Bloggers

A tripod is one of those things that most, overlook when they are starting out and just get the cheapest tripod they can find as it’s just a tripod after all.

Whilst it’s true that any tripod is better than no tripod, a quality tripod from the get-go will save having to burn through numerous cheap tripods. This is especially true if you are on the go & take a lot of photos outside.

Best Overhead Mount for Bloggers

Ever wondered how bloggers get those awesome flat lay images with products and accessories scattered across a vintage wooden table? The easiest way is to use an overhead mount, like this one, on your tripod.

You will be able to take images directly above any products you may be reviewing, create seasonal flat lays as well as other flat lays for both your blog and social media. When it comes to flat lays, the options are endless.

Best Lighting Kit for Bloggers

Lighting up your images is by far the single most effective way to make your images look more professional.

A lighting kit, like this one, allows you to position and angle your light in a way that accentuates your subject. This kit in particular also comes with two soft-boxes that soften the light, giving it a much more pleasing appearance and reduces hard shadows in your images.

Best Diffuser and Reflector Kit for Bloggers

When it comes to lighting, natural lighting is pretty much always the best.

As I mentioned above though, it’s hardly something you can predict or control. This is why lighting kits are so important indoors. When it comes to outdoor use, however, reflectors can help you target that brilliant natural light right where you want it and illuminate your subject with some beautiful soft light.

CONCLUSION:

Whilst all this photography equipment can really help you take better images for your blog, having a look around your home and thinking a little bit outside of the box might be able to save you some cash whilst still being able to take some pretty awesome images.

Use your smartphone, improvise with white cardboard & duct tape to create a reflector and a tripod. Use a mobile app to control your camera, etc. Start off small or invest in one item to get yourself going. And like everything when it comes to blogging, just keep practicing and you’ll improve in no time!

For guidance of camera equipment for portrait photography, please contact us.

Choosing best image

Tips for Choosing Your Best Images

Making decisions is crucial to the art of photography. They happen after you press the shutter

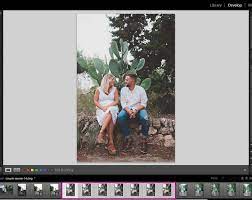
Snapselect lets you quickly pick your best images by conveniently viewing similar images and duplicates. This can save you valuable time. But what do you look for when you are self-selecting it?

Making decisions is crucial to the art of photography (and many other things). A lot of decisions happen before you press the camera’s shutter. A lot of decisions happen after that, too. One of the key decisions is choosing your best images.

How do you decide between two images nearly the same? Or which one out of many from a photo shoot is the best? What attributes indicate a keeper? Many advise to only show your best photos, yet rarely give much advice on how to choose. Here are a few ideas to keep in mind when evaluating your images. Read More Tips for Choosing Your Best Images

portrait photography

Amazing Techniques to Take Stunning Portraits

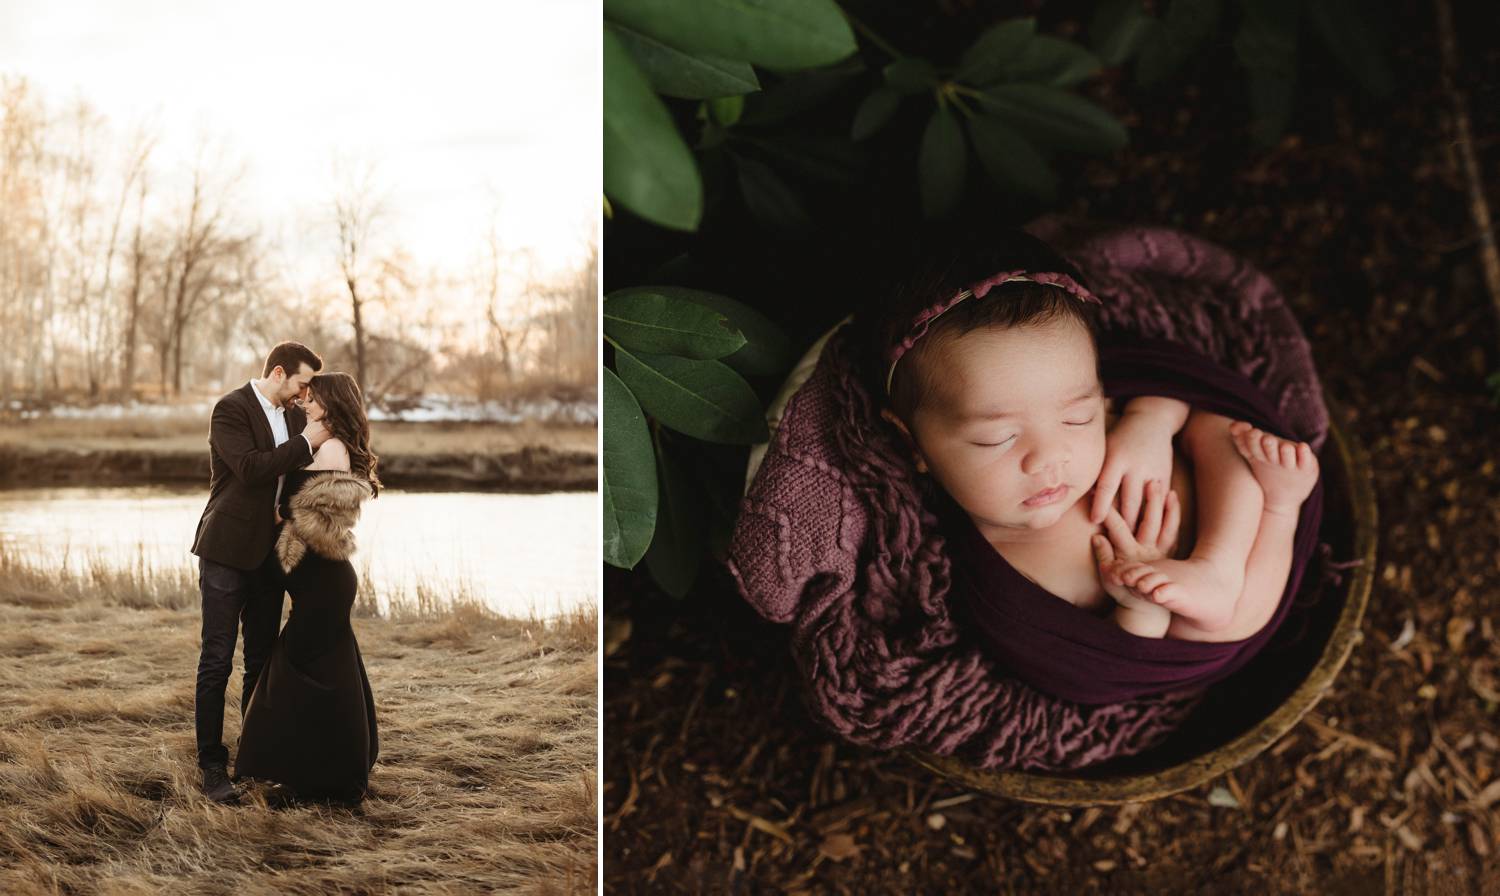
Professional photographers shoot 30+ weddings a year, and in doing that, sometimes it is easy to fall into the same old technique when it comes to portraits. Even with new poses, taking portraits can become very mundane if the same compositions and angles are used for every couple–we’ve definitely been through that creative rut where our pictures start looking very familiar. Throughout the years, we’ve challenged ourselves to stay on top of our game with a few useful techniques. Here are some of our best tips to help keep things fresh and unique for each couple.

1. Using a longer lens.

A lot of photographers say that their 50mm is a “must-have” portrait lens, but what a mid-range lens offers is a very familiar perspective, something that our eyes are used to seeing all the time. To create a more interesting image, we avoid shooting portraits in mid-range because the images look too ordinary. Most of our portraits are shot at 200mm or 85mm to create beautiful image compression that a 50mm would not be able to produce. The compression will not only flatter your subjects with less feature distortion but shooting at a longer focal length will also create more dramatic background blur and brings the background closer to your subject. It may be more difficult to communicate with your subjects while shooting at 200mm, but the difference will be apparent and well worth it. Our solution to this problem was to have one of us interact with our couples at close range while the other shoots from a distance.

2. Find angles that are not eye level.

Many times we are stuck seeing what is right in front of us. It is, after all, the easiest answer to everything. Challenge yourself to find a different angle from above or below eye-level to bring a new perspective to the image. This technique can also be used to flatter subjects of different body types and heights. In the image below, we asked the bride to sit on the ground in order to focus on her face and hair ornament while blurring out the rest of her body. It makes a more interesting image than the typical straight-on bridal portrait.

3. Use off-camera flash

During a wedding, our speed lites are never on-camera, even during the reception. Flash rarely flatters a person’s face when it is straight on, and the image loses its dimensionality. Using flash to light our subjects from the side, we are able to create both light and shadow on our subjects, flattering their features and bringing a greater range of highlights and shadows to the image. It also helps us bring out details in the background to create a more dramatic landscape.

4. Overpower the sun with flash

Shooting at mid-day is no easy task when using natural light. But with some artificial lights, something as simple as a couple of speedlites can diminish the power of the sun and darken the image for better exposure. We use this technique especially when we are trying to create environmental portraits that focus on the landscape. Using our speedlites, we are able to overpower the sun and underexpose the sky while only lighting up the subject. To create this amount of artificial light, we have to use 2-4 off-camera speedlites (with no diffuser) in order to generate enough light to overpower the sun. Holding the speedlites closer to the subject (to the side) also helps put more light on the subject and allows us to underexpose the background even more for dramatic effect.

5. Find back-light

It takes time and practice to train your eye to find great light. Once you learn how to “find the light” in any situation, it will help you master taking some amazing portraits. Lighting is, after all, the essence of photographic images. Whether you are using the sun, a window, or an ordinary light bulb, these light sources can be used to create beautiful edge light (a.k.a. hair light, rim light) when the light source is place behind your subject. The effect that rim light creates can enhance the dimension of your image by separating your subject from the background, outlining and focusing on your subject.

6. Shoot through objects

When objects are in our way, we like to use them to our advantage. In fact, many times we are purposely trying to find elements to place in the foreground of our image. Learning to find holes between tree branches, abstract objects, or even ordinary household items are simple, everyday things that will help enhance your images by bringing an interesting, and sometimes colorful, element to your composition. Using a longer lens will help blur out the foreground objects to frame the subjects in a more intimate way.

7. Use video light for night portraits

Video lights are very useful when no light source is available to light up your subject in dark situations. The great thing about video lights is that they are a constant light source so you can see what the image will look like in camera. We use LED video lights, which give us enough power to last 2+ hours. They are a great alternative to speedlites for low light situations and are quicker to adjust for dark situations.

8. Use gels on your speedlites

Adding CTO (orange) or CTB (blue) gels to your speedlites will change the mood of your image. Sometimes shooting in an environment which is overcast and very blue, adding a CTB gel will warm up the whole environment if you adjust the white balance correctly. CTO gels can also be used to emulate sunlight.

For guidance of camera equipment for portrait photography, please contact us.

Canon vs. Nikon vs. Sony vs. Panasonic

Best Camera Brand – Canon vs. Nikon vs. Sony vs Panasonic

When it comes to full package cameras, four brands that come to everyone mind are– Canon, Nikon, Sony and Panasonic. All four brands create brilliant cameras and optics. So the difficult question remains, how would you choose between Canon vs Nikon vs Sony vs Panasonic?

 All four offer excellent cameras for professionals and entry-level options for beginners. But once you used to one brand, switching becomes tough and expensive. You need to swap lenses and flashes too.

Choosing the right brand from the start is very important. To help you make that choice, we have put together all you need to know about Nikon vs Canon vs Sony vs Panasonic.

Canon

Canon has just about every lens you can imagine, including an incredible series of tilt-shift lenses. Canon also covers the entire price spectrum.

Canon bodies also have great ergonomics. They always felt great in my hands, and I really like the new mirrorless EOS R.

So what’s wrong with Canon? Well, I think they can add new features to their camera bodies for more options.

Nikon

There’s nothing horribly wrong with Nikon… but I find it hard to get excited about anything.

The Nikon D850 might be the greatest DSLR ever made, but its new mirrorless Z6 and Z7 cameras just don’t stand out from the pack.

Yes, Nikon makes great lenses, but Canon edges them out in terms of sheer selection and ingenuity.

Sony

Sony releases new cameras so fast that resale value isn’t so great (this is good if you buy used), and the lenses are on the expensive side. Sony lenses have a reputation for being overpriced

Still, pound-for-pound, Sony is the mirrorless King right now — at least until Canon and Nikon release more mirrorless lenses.

Panasonic

Panasonic makes excellent video-centric cameras in both the full-frame (S1 series) and micro 4/3 segments (GH series).

The S1/S1R cameras are freaking enormous. Pentax 67 of mirrorless are even bigger than most DSLR’s! And unfortunately, there are only a small number of lenses available, and they are all expensive.

The micro 4/3 cameras like the GH5 and G85 are very nice, but it is hard to get excited about them outside of video.

Best DSLR Brands for Video? Canon vs Nikon vs Sony vs Panasonic Cameras!

When you are choosing a DSLR for video, it can be difficult to know where to start. There are some BIG differences between the major brands like Panasonic, Sony, Canon and Nikon! Choosing the ‘Best Camera Brand’ is not a clean cut decision though… Which is ‘Best’ is highly subjective, and what works for you may not work so well for others…

While all individual DSLR (and mirrorless) camera models are unique, each of the brands has it’s own approach to software, features and functionality that tend to carry across the range – meaning that some brands are better suited for some requirements and workflows than others.

Whether you are in the market to purchase and looking to compare cameras & DSLR brands to find the best DSLR Camera for you, or you’re happy with your current model and just wondering what it’s like on ‘the other side’, then this video is designed to help provide an additional perspective.

Please let us know do you agree that we are in the golden age of cameras? Also, what brand is more attractive to you.

For guidance of camera equipment please contact us.

Photography equipments shops in karachi

Best Photography Equipment List for Beginners

If you are a beginner in photography, there are a few key types of equipment that are considered essential gear and you should have them. Once you have built up the necessary photography skills, then you can invest further in photography equipment. Assuming you already have an effective camera for photography, here’s an essential photography equipment list to get you started on the right foot.

Camera Tripod


Few camera accessories are necessary such as a tripod. Whether you are shooting a portrait, landscape, night, street, or even wedding photography, you are going to need a tripod at some point or another. Tripods are very useful in low-light environments as the stability of a tripod allows you to take longer-exposure shots without any shake of the camera.

Remote Shutter Release


remote shutter release is useful as it lets you “take a shot” without touching the camera body, which eliminates the potential for camera shake and accidental blurring. It is most often used in conjunction with a tripod.

Prime Lens


As you enhance your photography skills, you wll end up purchasing plenty of different  types of lens from Goldencamera.pk that let you take all kinds of shots. But in the beginning, you will be better off starting with a single prime lens. Why you should go for a prime lens? Because the inability of it allows you to zoom and can teach you a lot about proper composition techniques. With a fixed camera lens, you have to think through your shots more, which stretches your skills and helps you improve faster. For Canon and Nikon, the 50mm f/1.8 prime lens is the cheapest lenses, making it a great piece of photography equipment for beginners.

Photography Lighting Equipment


Every photographer needs flash at some shoot, even if you do not intend to shoot in the dark always. It is recommended to not use the built-in flash on your camera body. Instead, spend a little bit on your photography lighting equipment and use an external flash unit.

SD Memory Cards


It is always better to have a handful of smaller SD cards than one big SD card. That way, there occurs any problem or if a card ever gets corrupted, you still have other options to use. There is nothing worse scenario than being unable to shoot because your only card died.

Camera Cleaning Kit


Dust, dirt and moisture can always get into camera bodies, lenses, and other accessories. In the worst case, your expensive camera and lenses may suffer permanent damage. Not paying attention to camera maintenance may be the most expensive mistake you can ever make. That is why you should learn how to properly clean camera gear yourself with a camera cleaning kit.

Camera Strap


As soon as you collected all the other stuff listed, you should go for a quality camera strap. The difference between a good strap and a kit strap is like night and day, and you definitely won’t regret it.

Camera Bag


Once you have all the aforementioned items bought, you will obviously need to carry it all with a properly designed bag for the shoot. Photography equipment is only useful if you have it with you when you want to take pictures! Beginners should consider this large DSLR gadget bag from Goldencamera.pk. For the price, you won’t find another bag that feels as robust and durable. If you intend to also carry a laptop around with you, then you may want to consider the DSLR and laptop backpack instead.

Photography Studio Equipment


If you are looking to get started in setting up a small studio and practice working with lights, backdrops and models then you will need to add a few essential pieces of photography studio equipment to the mentioned list. A fully professional photography studio outfit probably has more lights than you can count on your fingers. If you are just about to start, begin with some entry-level softbox lights or umbrella lights.

Don’t miss out on our great camera equipments and feel free to contact us

Still photography

Tips Of Black and White Still Life Photography

Black and white still life photography is beautiful in its simplicity. Still life photography is all about subjects that are inanimated and cannot move. For example you can capture food, ornaments, flowers etc.Here are top 5 tips to get the best of black and white still life photography.

1. Learn to Think in Black and White

Planning and thinking as a black and white photographer and a still life photo shoot is essential. This process requires a bit of brain storming. Thinking in that way, you will choose the right objects, story and, lighting for your images.

Get inspirations from photographs of the same field and check out their work for the better results. Masters in the field such as Edward Weston and Karl Blossfeldt were pioneers of still photography. They made unique works of art in black and white from simple everyday objects.

2. Enhance Textures and Shapes With Lighting

Without getting colors in the way, you can still play to the great strengths of black and white photography like with shapes and texture.  Look to see where lines intersect and how light accentuates different textures.

Think about this throughout the black and white still life photography process. From selecting your subject matter and photographing it, to post-production and presentation.

It is preferable to use low key lighting with either  sunlight near a window, or a soft sidelight. You can also experiment with and without a reflector. That way, you can check which works best for texture and shape.

Also, move your subject around and see how it catches the light from different angles. Sometimes a subtle move of half a centimetre can make a big difference.

3. Photography

If you are capturing an image without people or movement, it still can tell a story.  You can consider shapes of leaves at different stages of their life cycle. And how different tones can convey emotion into your photography.

Black and white images of flowers gives the true beauty of their lines and shapes. Black and white flower photography is a great starting point for monochromatic still life photography.

Texture and style of a weathered shoe in black and white tell us about their owner, even if you do not feature a human in the photograph.

Antique things give stunning impact in black and white photographs. And you can enhance the story by using sepia or warm monochrome tones.

Look around your home or yard. See what subjects you can find that tell an impactful story. Even the most mundane object can become a work of art. All it needs is the right texture and shape with careful lighting and post-production.

4. Use Simple Compositions to Stand Out

Black and white photography is all about shapes, textures and lines. It is very important to use a clear and simple composition that does not get distracted from these elements.

If you are not certain of your composition, remove something from the frame of your area. Or take a step back to include more negative space.

5. Use the Color Sliders to Enhance Black and White Still Life Photos

When it comes to black and white still life photography, clicking the shutter is only solution of the process. Fine-tuning images in post-production is the important final step.

Clarity adjustment, dodging and burning, and spot removal are standard techniques to tidy up your photo in Lightroom or Camera Raw. But the tool I use most with my black and white still life photographs is the HSL (hue, saturation, luminance) colour slider.

Moving individual sliders up or down gives you great control of light and shadows. It can transform your photograph by defining textures and shapes and even changing the focal point.

Conclusion

Still life photography in black and white provides great opportunities. Just keep it simple; start with objects you are familiar with. Experiment with whatever light and textures and equipment you have on-hand.

Push the boundaries with your black and white still life photography, and don’t be afraid to get a bit arty!

Don’t miss out on our great camera equipments and feel free to contact us

Best Cameras In 2021

The Best Cameras In 2021: DSLR Cameras For Beginners, Enthusiasts, and Professionals

The best cameras have to do all sorts of jobs, from wedding, to high-resolution commercial photography of sports to video . The best cameras are some of the most hardy and reliable thing around – as mirrorless camera technology becomes more common. While mirrorless cameras can be tempting propositions, the best DSLRs can offer incredible shooting experiences, often incorporating mirrorless technology and features, such as on-sensor phase-detection autofocus and m

 Nikon D3500

Nikon D3500 is budget friendly, light, small and easy to use camera– all the qualities that beginners can be appealed also. It seems as if camera system is advancing at great speed right now, but this camera has all the qualities we look into for in a beginner’s camera, and we still haven’t found anything to touch it at this price.

Type: DSLR

Sensor: APS-C

Megapixels: 24.2MP

Lens mount: Nikon F (DX)

Screen: 3in, 921,000 dots

Max burst speed: 5fps

Max video resolution: 1080p (Full HD)

 User level: Beginner

Canon EOS 90D

This is the best Canon camera for enthusiasts that left few professional videographers and photographers taking a look too. It came with groundbreaking specifications that no other camera in this category can match at all.

Type: DSLR

Sensor: APS-C

Megapixels: 32.5MP

Lens mount: Canon EF-S

Screen: 3in vari-angle touchscreen, 1,040,000 dots

 Viewfinder: Pentaprism

Max burst speed: 10fps

Max video resolution: 4K UHD

User level: Enthusiast

Nikon D7500

Nikon followers looking for an all-round equivalent to the all purpose Canon EOS 90D should also take a look at the Nikon D7500. It offers a slightly faster 8fps continuous shooting speed, and a proven 51-point autofocus system with the ability to capture 4K video at once. This camera has a lower resolution (20MP vs 32.5MP) but in real-scenes shooting its high performance sensor delivers potos which are not far behind the results by the Canon, despite the difference in megapixels.

Type: DSLR

Sensor: APS-C

Megapixels: 20.9MP

Lens mount: Nikon DX

Screen: 3.2in tilting touchscreen, 922,000 dots

Viewfinder: Pentaprism

Max burst speed: 8fps

 Max video resolution: 4K

User level: Enthusiast

Nikon D780

Nikon D780 takes detection autofocus in the on-sensor phase of Nikon’s own mirrorless Z6 to offer a DSLR with mirrorless camera live view in fantastic performance! This camera is like a supercharged, modernised version of Nikon’s popular D750 model. Nikon D780 doesn’t just have advanced live view but it also comes with a high resolution tilting touchscreen, dual UHS-II compatible memory card slots , 4K UHD video, and continuous shooting speeds about 12fps in live view mode.

Type: DSLR

 Sensor: Full frame

Megapixels: 24.4MP

Lens mount: Nikon FX

Screen: 3.2in tilting screen, 2,359k dots

Viewfinder: Pentaprism

Max burst speed: 7/12fps

Max video resolution: 4K UHD

User level: Enthusiast/professional

Canon EOS 6D Mark II

We adore Nikon D780, but Canon EOS 6D Mark II has been in the market longer and has much impressive feature. The 26-megapixel sensor is more than enough, it also does have Canon’s Dual Pixel CMOS AF system, so the autofocus in live view is very speedy and effective.

Type: DSLR

Sensor: Full frame

Megapixels: 26.2MP

 Lens mount: Canon EF

Screen: 3.2in vari-angle touchscreen, 1,040,000 dots

Viewfinder: Pentaprism

 Max burst speed: 6.5fps

Max video resolution: 1080p (Full HD)

User level: Enthusiast

 Nikon D850

Nikon D850 is a costly camera but its features put it in a class of its own. It has 45.7MP resolution, and 153-point autofocus system. It can capture pictures at 7 frames per second – or 9fps with an optional MB-D18 battery power.

Type: DSLR

Sensor: Full frame

Megapixels: 45.7MP

 Lens mount: Nikon FX

Screen: 3.2in tilting touchscreen, 2,359,000 dots

Viewfinder: Pentaprism

 Max burst speed: 7fps

Max video resolution: 4K

User level: Enthusiast/professional

WRAP UP

Choosing the best professional camera is not just about picking the one with the most enticing specifications but you have to look at the camera as a whole, its model, its lenses, and what is set to be released in its future. Before choosing a system, it is worth asking yourself a lsit of questions: 

1) Are you switching from a different systems? If you are switching from a different system, it is worth looking well into whether there is any potential compatibility between your existing and new system. Existing system migration is much simpler and cheaper than starting with a whole new setup again.

2) What lenses will you need? Think about the typeof work you need and the lenses you reuqire for the purpose and check whether the system you are choosing can meet those requirements.

3) DSLR or mirrorless? It does sometimes feel like mirrorless is getting around the world, but the best DSLR cameras do still have their advantages, like the Canon EOS-1D X Mark III, are making new ground.

Shop with us to experience more or contact us.

intentional camera movement

Take Creative Landscape Shots Using Intentional Camera Movement

If you are looking to take some creative and unique pictures, then trying out intentional camera movement photography is highly recommended.

Now, many photographers rely on ensuring your camera is not moving during exposure for sharp images. But the question is, is keeping your camera still always a good idea?

Instead, why cannot we throw caution to the wind, camera can be moved while the shutter is open, and explore variety of creative opportunities this brings to you as a photographer?

In this blog, we will tell you how to do that exactly!

What is intentional camera movement and why should you consider it?

Intentional camera movement or ICM is a technique of taking picture from the camera where you move it as the photo is taken.

To be specific, intentional camera movement can be used to capture creative and unique landscape shots. This technique can be liberating exceptionally, and by minimizing the number of errors occur in a landscape, it allows you to concentrate on form, line, and color in your images.

With Intentional camera movement, a scene that you may consider just ordinary too cluttered now will come to life It is done by letting you blend shapes and colors for an interesting abstract shot.

If you are up to make your next photographic project stunning and inspiring then you want to get your creative juices flowing and intentional camera movement is a technique that you should try at least once.

In fact, it is relatively easier to take some stunning shots with ICM technique.

The Best Settings For Intentional Camera Movement Photography

A key factor to get right portraits when using ICM is your shutter speed. Exposure needs to be long enough to capture significant amount of motion blur (With different shutter speeds you will get different effects).

In general, from 1/3s or 1/2s all the way down to multi-second exposures is recommended. But of course, you are always free to experiment yourself with shutter speeds whether faster or slower; the core of a creative technique like ICM is simply playing around.

Because of long shutter speeds, shooting in low-light conditions is ideal for this technique. During the daytime, it can be harder to achieve the required shutter speeds, even at your camera’s lowest ISO setting and your lens’s smallest aperture (i.e., highest f-stop number).

Moving your camera

Once shutter speed is in your control, the next step is to determine the movement of camera after pressing the shutter button.

Go creative; there are no rules for this! You can move the camera horizontally, vertically, or diagonally. You can move it fast or slow. Alternatively, you can move the camera 360 degrees to create a spiral effect, or it can be changed to the focal length on a zoom lens during exposure to create a zoom effect.

You can combine even two or more of these movements to create something creative, this can be done with practice. The look and feel of your final products will be determined by the direction, speed, and smoothness of your chosen movements.

Most importantly tripod option is always there to control the camera movement. This essential  will help you to capture a smoother pictures, which can be useful if you wish to retain a straight horizon line.

What to shoot for the best results

Now till this step you know how to capture beautiful photos with ICM technique, all that is left is to pick ICM subjects now.

A good place to begin this is by finding locations that offer striking colors, patterns, and lines

For example, Forests are a favorite ICM subject – Clean, parallel lines by the trees, as well as the amazing bright colors of nature (gives by flowers in the spring and fallen leaves in autumn), lend themselves to a vertical camera movement shot. The movement can be from the bottom up or from the top down, and it can be fast or slow; it really just depends on the effect you wish to create and how experimental you want to be.

A few intentional camera movement tips

Intentional camera movement is a highly subjective art technique, and what works for you will not work for others.

Also, keep in mind basic principles of photography, such as  composition and exposure – these are still very important!

Also, while the ICM technique will give you a very abstract result, you may find it helpful to have at least one element of the scene sharp or recognizable in the final image

Finally, there is an element of trial and error when starting out with intentional camera movement. You’ll quickly find out what works for you and what doesn’t; this will help you develop your own style.

Get more guidance on this topic or shop with us. For more information email us at [email protected] or call: +923122951169.

Nikon D3500

Nikon D3500 For Travel Photography? Great Choice or Not?

It is amazing to discover how good is this beginners camera along the journey of self-teaching. Comes with Adobe Lightroom and produces many photos that will make you proud.

One doesn’t need to be a photographer to know a great photo when you see one. And you necessarily don’t need to be a professional photographer to take a great picture, you just need the Nikon D3500. It is as easy to use as a point-and-shoot, but it takes amazing DSLR photos and videos that stand unique. It feels balanced in your hands, sturdy and outstanding with controls where you need them. It’s compact, versatile, durable and, ideal for travel. And it works flawlessly with compatible smart phones, making it easier to share your great photos. Even if you have never used a DSLR camera, you still can take beautiful pictures with Nikon D3500.

Things You Should Know About Nikon D3500

Let’s talk about its amazing features now.

It’s a DX-format DSLR

Due to the compromising field of view, DX-format cameras are comparatively cheaper, compatible and lighter. Same goes for their lens, which is also cheaper and lighter than FX-format lenses.

That explains why beginner DSLR cameras has mostly DX-format. They are cheaper than FX-format DSLR cameras and it is better to test the water before keeping your whole foot into the pool of photography.

The Kit Lens

kit lens is a lens that comes along with the camera at the time of purchase. For Nikon D3500 18mm has wider angle compared to 55mm. That means you can zoom in from 18mm to 55mm. Keeping in view that the camera still delivers great photo quality no matter how much we zoom in with your lens (not digitally), unlike, most smart phones in the market.

VR stands for Vibration Reduction

VR is also known as Image Stabilization for Canon though, both are same. As the name suggests, it minimizes the vibrations caused while taking the photo like your shaky hands.

Videos at the touch of a button

Recording beautiful video with the Nikon D3500 is as easy as taking photos. Just change the Live View lever and press the recording button. You will be capturing awesome 1080/60p Full HD video effortlessly and instantly. Use your lens’ zoom capability to shoot wide angle videos or tight close-ups.

Superb NIKKOR lenses; the eyes of the D3500

Every Nikon DSLR lens offers new perspectives. Discover inspiring world with an extreme close-up macro lens. Give your backgrounds a charming out of focus effect with a fast prime lens. Zoom lens  will capture the whole scene with an ultra-wide-angle.

The day tripper

Small enough to be discrete, durable enough to withstand rough conditions; the camera is also available with two outstanding travel lenses, you will never want to leave home without your Nikon D3500.

WHY YOU SHOULD GO FOR NIKON D3500?


Great For Portraits

 If you take a lot of portraits during your travel, I would say a Nikon D3500 is your thing to carry. Switching to a better lens with a wider aperture would be a great option.

Sharp Images with Kit Lens

Images captured using kit lens are usually better than expectations. Nikon did a great job when it comes to this.

The Cheap Price Tag

Nikon D3500 is the perfect entry-level DSLR for all the beginners. Comparing the similar entry-level DSLR cameras between Nikon and Canon, the price sounds more appealing for Nikon D3500 (check our website).

Quick Auto Focus for Kit Lens

Nikon did an amazing job for the kit lens. The speed of the autofocus is quick, smooth and accurate. Unlike the F1.8 Nikon lens that I bought, which took a little longer to focus and a little noisier.

Long Battery Life

Nikon D3300 is capable of capturing 700 shots spanning multiple hours. I once went camping without my charger for 3 days. By the time I got home, I had 2/3 battery life left despite taking hundreds of photos. Impressive, huh? And something more impressive, Nikon D3500 captures 1550 shots in one-go!

Small and Light

Travel is all about packing like a minimalist for some. In that case, Nikon D3500 did a great job because it’s probably one of the smallest DSLR cameras out there.